# INTRODUCTION
**SmartBooks Accounting Software** includes **7 core accounting modules** and **6 extended management modules**
Main Accounting Modules (8 modules)
· General Ledger
· Account Payables
· Account Receivables
· Cash Management
· Fixed Asset Management
· Inventory Management
· E-Invoice
· Master Data, Setup Tools, Userguide
Extended Management Modules (5 modules):
· Purchase Order
· Sales Order
· Budget
· Approval System
· Customer Portal
\------------
*General Ledger*: Allows users to set up and enter account information, create adjusting and closing journal entries, and generate financial statements
*Accounts Payable*: This module enables users to record and manage all payables and monitor outstanding liabilities with suppliers
*Accounts Receivable*: This module enables users to record and manage all receivables and track outstanding balances with customers.
*Cash Management*: Allows users to monitor transactions related to cash and cash equivalents, including receipts and disbursements.
*Fixed Asset Management*: Allows users to record and track fixed assets and prepaid expenses, manage depreciation, and generate related reports.
*Inventory Management*: Enables users to manage stock receipts, issues, and balances, calculate product costs, and determine the cost of goods sold.
*E-Invoice*: Used for issuing and printing electronic VAT invoices in cases where the business is authorized to self-print.
*System Setup & Master Data*: Includes configuration of master data (suppliers, customers, chart of accounts, posting rules, etc.), user setup (accounts, passwords, access permissions), and built-in software user guides.
*Purchase Order*: Allows users to manage all purchase orders and supplier transactions of the business.
*Sales Management*: Enables users to manage customer sales orders — including orders in progress, completed, delivered, or pending delivery
*Budget Management*: Allows users to create, allocate, and monitor company budgets
*Approval System*: Enables users to define approval workflows for purchase orders, payments, business trips, and cash transactions
*Customer Portal*: Provides consolidated analytical reports and trend dashboards for revenues and expenses by fiscal year, customer code, or supplier code
# 1.1 Master Data
#### 1.1.1. Chart of Account
SmartBooks provides a standard chart of accounts in accordance with Circular No. 200/TT-BTC issued by the Ministry of Finance on December 22, 2014.
In addition, SmartBooks allows users to create additional sub-accounts at level 2, level 3, and so on (up to level 5) based on the predefined main accounts
**Account Creation Guide**
· Account Code: Enter the sub-account code. (\*)\
Note: SmartBooks uses a default 7-digit account code format.
· Account Name (VN): Enter the account name in Vietnamese
· Account Name (EN): Enter the account name in English.
· Account Name (KR): Enter the account name in Korean or other languages
· Account Type: Select the account type according to its nature: Asset, Liability, Income, or Expense
· Account Group: Select the main account group (first 3 digits)
· Status: Set the account status as Active or Inactive
Select **Save** to save the newly created account, **New** to create another account, or **Close** to exit the input window.
Delete an Existing Account
· Select the account line you want to delete
· Click the **Delete** button
Note: The setup of the chart of accounts directly affects the general ledger, detailed ledgers, and financial statements. Therefore, users should carefully review before deleting any account. If transactions related to the deleted account have already been recorded, it may affect the accuracy of reports.
#### 1.1.2 Account Class
SmartBooks provides a predefined list of level 1 and level 2 account groups in accordance with Circular No. 200/2014/TT-BTC dated December 22, 2014.\
Users may create additional level 1 and level 2 account groups after obtaining approval from the Ministry of Finance
**Account Class Creation Guide**
· ClassID: Enter the code of the level 1 account to be created.
· Description (VN): Enter the description in Vietnamese.
· Description (EN): Enter the description in English.
· Description (KR): Enter the description in Korean.
Select **Save** to save the newly created account class, **New** to create another account class, or **Close** to exit the input window.
#### 1.1.3 Setup Balance Sheet
SmartBooks provides predefined items displayed on the Balance Sheet (BS) in accordance with Circular No. 200/2014/TT-BTC dated December 22, 2014.\
Users can remove unnecessary items from the Balance Sheet by clicking the selection box.
· **Step 1**: Set up the following information: Code, Description (VN, EN, KR), Total (using the sum function), and Status (to display or hide the item on the Balance Sheet).
· **Step 2**: Assign account balances according to the corresponding codes on the Balance Sheet
o **BalType**: two types (D – Debit balance; C – Credit balance)
o Account: press F3 to select the account
o Next Step: ndicates whether the balance on the Balance Sheet is calculated as a negative or positive value
o Code: the code used on the Balance Sheet
o **Beginning, Ending**: beginning and ending balances from the most recent Balance Sheet (can be used for data verification)
· **Step 3**: Link the sub Balance Sheet codes to their corresponding higher-level Balance Sheet codes
· **Step 4**: Link the total Balance Sheet codes to the highest-level summary Balance Sheet codes (these codes do not have balances from any accounts).
#### 1.1.4 Closing Entry Delararion
This function allows users to set up the automatic closing entry method at the end of the accounting period.
**Setup Guide**
· Account/ To Account: Enter the source account (press F3 to select or enter directly).
· AmtType: Specify the transfer method for the source account balance (C – transfer the **credit** side, or D – transfer the **debit** side)
· StepCode: Define the transfer steps (for example, transferring from accounts of type 5, 6, 7, 8 to 911 is step 1, and transferring from 911 to 4212 is step 2).
· Description.
# 1.2 Input
#### 1.2.1 General Journal Entry
The GL module allows users to directly enter general journal entries or other specific accounting transactions.
Data Entry Guide
. Select **New** to open the data entry window
· Journal Information Section
o Subsystem: GL (General Ledger)
o Voucher No: Leave blank; the system will automatically assign a sequential number to the journal entry. (Press F3 to view previously entered entries)
o PO date: Must fall within the accounting month
o Period: Select the posting month (for example, posting for June 2015: 062015)
o Description (VN): Transaction details in Vietnamese
o Description (EN): Transaction details in English
o Description (KR): Transaction details in Korean
o Voucher Status: Hold – temporarily saved; Released – processed and posted to the ledger
· Posting Section
Users can choose which fields to display, such as Description, Tax, Cost Code, Profit Code, Process Code, etc.
o Select **New** to open the data entry window
o Debit: Press F3 to select an account or enter it directly.
o Credit: Press F3 to select an account or enter it directly
o Currency: Select the currency type (VND, USD, KOR, etc.).
o Cury Rate: Enter the posting Cury rate if the currency is other than VND.
o Amount: Enter the original amount
o Domestic Amount: The system will automatically calculate this value, or users can input it manually
o Description (VN), (EN) and (KR): Automatically appears based on the journal information section. Users can modify the detailed description by entering it directly.
o Employee ID/ Vendor ID/ Customer Code: Users can input or press F3 to select the corresponding code from:
§ Employee List (Cash Management module),
§ Vendor List,
§ Customer List (Accounts Receivable module)
o Invoice No./ Invoice Date/ Serial No: Enter invoice information (if applicable) so the system can generate the corresponding input or output VAT report.
o Cost ID/ Profit ID/ JobCenter: Used for internal reporting or cost calculation purposes.
Select **Save** to store the entered information, **Delete** to remove redundant lines, **Copy** to duplicate all details from an existing voucher, and **Process** to change the voucher status to *Released*.
#### 1.2.2 Offset Journal Entry
Used in cases where it is necessary to offset accounts receivable and accounts payable.\
Select New to open the data entry window.\
The Journal Information section and the Data Entry Grid are performed in the same way as for General Journal entries.
Note: It is necessary to enter the Supplier, Customer Code, or Employee information so that the Detailed Account Balance Report reflects accurate figures for each entity
# 1.3 Process
#### 1.3.1 Post Transaction
At the end of the year, the general accountant will transfer all account balances to the next fiscal year.
#### 1.3.2 Un-release Batches
This function allows users to restore the original status (Hold) for journal entries that have already been posted or released.
**Restoration Guide**
· Subsystem: Select the accounting subsystem to be restored:
o General Ledger (GL)
o Accounts Payable (AP),
o Accounts Receivable (AR),
o Cash Accounting (CA),
o Inventory Accounting (IN),
o Fixed Asset Accounting (FA).
· Adjustment Period: Select the posting month or year, then click **Load** to display the list of journal entries that have been locked.
The grid in the window will display all journal entries recorded in the closed accounting period.
· Select the journal entry to be un-released.
· Click **Execute** to perform the action
#### 1.3.3 Closing Data By Month
Used to lock the accounting books, preventing any edits by users without the appropriate access permissions.
# 1.4 Inquiry
#### 1.4.1 Transaction Inquiry
The detailed posting section allows users to review and verify transactions and journal entries after they have been released in each subsystem. Users can either export the data to Excel or view it directly on the screen.
When viewing directly, users can filter journal entries using the displayed fields.\
Users can also choose which fields to display on the screen.
· Accounting Subsystem (GL, CA, FA, AP, AR, FA…)
· Accounting Period: Posting month (VD: 012009 là tháng 01 năm 2009)
· Voucher No/ Voucher Date
· Foreign Currency/ Exchange Rate
· Debit Account/ Credit Account
· Amount/ Foreign Currency Amount
· Description
· Vendor/ Customer/ Employee
· Invoice Information
· Cost ID/ Profit ID/ Operation ID
# 1.5 Report
After the accounting data has been processed in the respective accounting subsystems, users can generate the following reports.
#### 1.5.1. Trial Balance
· Select the accounting period to be exported (From date… To date…)
· Select the currency to be displayed (Currency ID)
· Choose to view the report on screen, print it as a PDF, or export it to Excel
For accounts that are not receivable or payable accounts (131, 331, 138, 338), double-clicking on a summary data line will display the detailed ledger for that account
For receivable and payable accounts (131, 331, 138, 338), double-clicking will display the outstanding balance details by each related party.
In cases where you want to export the Trial Balance with detailed receivable and payable information by each related party, double-click the corresponding receivable or payable account (131, 331, 138, 338), then select **Export to Excel**
#### 1.5.2 Summary General Ledger
· Select the accounting period to be exported (From date… To date…).
· Select the currency to be displayed (Currency ID)
· Select the type of account to be exported (Option)
o All Account
o By account (press F3 to select the account number)
Select **Print** to view it in PDF format or **Export to Excel**.
Export excel với lựa chọn tất cả các tài khoản (All):
· Sheet DOCSMAP: Danh mục các tài khoản chi tiết có trên file excel báo cáo
· Click vào tài khoản để kết nối đến sheet cần xem
· Trên từng sheet excel chi tiết: click DOCSMAP (ô B10) để trở về sheet DOCSMAP.
#### 1.5.3 Ledger Account Listing Detail Report
· Select the accounting period to be exported (From date… To date…)
· Select the currency to be displayed (Currency ID)
· Select the type of account to be exported (Option):
o All Acount
o By account (press F3 to select the account number)
· Select the report type
Choose **Print** to view it in PDF format or **Export to Excel**
\- When selecting **Export GLDetail Report**:
· Sheet Index: Lists all detailed accounts included in the Excel report.
· Click an account to navigate to the corresponding detail sheet
· On each detailed Excel sheet: click **DOCSMAP** (cell B10) to return to the Sheet Index.
\- If selecting **Export GLDetail Main Account**: displays the report by main account level.
\- If selecting **Export Full Report**: similar to exporting GLDetail, but also includes the **Balance Sheet (BS)**, **Trial Balance (TB)**, and **Profit and Loss Statement (PL)**.
#### 1.5.4 Balance sheet
· Select the accounting period to be exported (From date… To date…).
· Select the currency to be displayed (Currency ID)
· Choose to view the report on screen, print it as a PDF, or export it to Excel
**Preview button**: displays information showing which accounts the report indicators are sourced from.
Export to Excel button: exports the report to Excel with the following options:
· **Detail**: exports an Excel file containing indicator information from detailed accounts.
· **Summary**: exports an Excel file containing only summarized indicators.
**Print button**: prints the report.
· If the summary data grid is displayed, the report will be printed with summarized figures.
· If the detailed data grid is displayed, the report will be printed with detailed account information.
#### 1.5.5 Income Statement
· Select the accounting period to be exported (From date… To date…).
· Select the currency to be displayed (Currency ID)
· Choose to view the report on screen, print it as a PDF, or export it to Excel
**Preview button**: displays information showing which accounts each indicator is derived from
**Export to Excel button**: exports the report to Excel with the following options:
· **Detail**: exports an Excel file containing indicator information from detailed accounts.
· **Summary**: exports an Excel file containing only summarized indicators.
**Print button**: prints the report.
· When the summary data grid is displayed, the report will be printed with summarized figures
· When the detailed data grid is displayed, the report will be printed with detailed account data.
#### 1.5.6 Cash Flow
· Select the accounting period to be exported (From date… To date…).
· Method of calculation: direct or indirect
· Choose to view the report on screen, print it as a PDF, or export it to Excel
#### 1.5.7 Daily Trial Balance
· Select the accounting period to be exported (From date… To date…).
· Choose to view the report on screen, print it as a PDF, or export it to Excel
#### 1.5.8 Particulars of Manufacturing Cost Statement
· Select the accounting period to be exported (From date… To date…).
· Choose to view the report on screen, print it as a PDF, or export it to Excel
#### 1.5.9 Non-Manufacturing Cost Statement
· Select the accounting period to be exported (From date… To date…).
· Choose to view the report on screen, print it as a PDF, or export it to Excel
#### 1.5.10 Statement of Production Cost
· Select the current accounting period to be exported (From date … To date …)
· Select the comparison period (From date … To date …)
· Choose to print the report in PDF format or export it to Excel
#### 1.5.11 General Journal
· Select the accounting period to be exported (From date… To date…).
· Choose to view the report on screen, print it as a PDF, or export it to Excel
#### 1.5.12 Print Accounting Voucher/ Print Payment Voucher/ Print Receipt Voucher
· Select the comparison period (From date … To date …)
· Choose to print the report in PDF format or export it to Excel.
#### 1.5.13 Automatic Postings
· Select the comparison period (From date … To date …)
· Choose to print the report in PDF format or export it to Excel.
# 2.1 Input
The Accounts Payable (AP) module has two main functions:
· Input
· Reports
### 2.1 Input
#### 2.1.1 Supplier Invoice
Invoices related to inventory movements are entered in the Inventory Management module. When processed, they will be linked to the Accounts Payable module.
Invoices for materials, supplies, and other service expenses (such as electricity, water, telephone, or rent) that generate payables are entered directly in the Accounts Payable module.
Vendor Invoice Data Entry Details
Select **New** to open the data entry interface
· **General Information**
o Voucher No: Enter the voucher number or let the system auto-generate it.
o PO Date: Must fall within the accounting period.
o Period: Automatically generated by the system based on the voucher date
o Invoice No/ Serial No/ Invoice Date: Enter the information as shown on the invoice
o Vendor ID: Press F3 to select the vendor or enter the vendor code manually (the system will automatically validate the code)
o AR Account: Press F3 to select or enter the detailed account number
o Currency ID: Select the foreign currency and enter the exchange rate
o Payment term: Press F3 to select
o Pay Date: Select the payment date
o Description (VN - EN): Enter the description
· **Detail Information**
Each invoice detail is entered as a separate line in the data grid:
o Account: Press F3 to select or enter the account number (the system will automatically validate it; if the account is invalid, the system will not allow moving to the next field)
o Currency: Select the payment currency (the system defaults to the currency from the general information section)
o Cury Rate: Enter the exchange rate of the payment currency against VND (the system defaults to the rate from the general information section)
o Sub Total: Enter the pre-tax or foreign currency amount.
o Domestic Amount: The amount after applying the exchange rate
o Tax ID: Press F3 to select the corresponding tax rate.
o Tax amount: the actual tax incurred.
o Domestic Amount: the tax amount converted based on the exchange rate (if applicable)
o Description (VN - EN): Automatically filled in from the description entered in the summary section above.
o Invoice No./ Serial No./ Invoice Date: Invoice information
#### 2.1.2 Voucher **Released**
This function is used to lock the recorded payable entries and post them to the ledger
· **Released** a single voucher
o Select the voucher to be **Released** from the voucher list.
o Click **Released**
· **Released** multiple vouchers
o In the voucher list, filter vouchers that have not yet been **Released** (status: *Hold*).
o Select the vouchers to be **Released**.
o Click **Released**
# 2.2 Báo cáo
#### 2.2.1 Payment Detail Report
· Select the accounting period to be exported (From date… To date…)
· Select the currency type
**·** Select account **331** or **338**
· Choose to include **all vendors** or filter by a specific vendor
Click **Print Report** to view it on screen or **Export to Excel**
When exporting to Excel for all vendors
· Sheet Sum: summarizes payables for all vendors. Click on a vendor name to navigate to its corresponding detailed sheet
· Detailed sheets: click **DOCSMAP** to return to the **Sheet Sum** page
#### 2.2.2 Vendor Payment Summary Report
Similar to the Accounts Payable Detail Ledger
· Select the accounting period to be exported (From date… To date…)
· Select the currency type
**·** Select account **331** or **338**
· Choose to include **all vendors** or filter by a specific vendor
Click **Print Report** to view it on screen or **Export to Excel**.
#### 2.2.3 Account Payable 331-338
Similar to Payment Detail
#### 2.2.4 Statement of VAT Input
· Choose From date … To date …
· Click **Print** to view it on screen or **Export to Excel**
#### 2.2.5 Print All Payment Voucher
· Choose From date … To date …
· Click **Print** to view it on screen
#### 2.2.6 Payment Tracking Book/ Invoice Tracking Book
The same with Print Payment Voucher, Print Accounting Voucher
#### 2.2.7 AP Overdue Report
· Select Todate
· Select Currency
Print the report for **all vendors** or for a **specific vendor**
#### 2.2.8 AP Aging Report
# 3.1 Account Receivables
The Accounts Receivable (AR) module has two main functions:
· Input
· Reports
### 3.1 Account Receivables
Sales invoices that involve inventory tracking must be entered in the **Inventory Management module – Sales section**.\
Service sales invoices that do not require inventory tracking are entered directly in the **Accounts Receivable module**
#### 3.1.1 Output Invoice
Select **New** to open the data entry interface. All entered vouchers are set to **Hold** status by default until they are processed
· **General Information**
o Voucher No: Automatically generated in sequential order.
o PO Date: Enter the transaction date (must be within the accounting period)
o Period: Automatically assigned based on the transaction month.
o Invoice No/ Serial No/ Invoice Date: Enter the invoice details.
o Customer Code: Press F3 to select the customer code.
o AR Account: Press F3 to select the receivable account.
o Currency, Currency ID: Depending on the currency type, the system will apply the corresponding exchange rate to VND.
o Payment term: Press F3 to select the payment term.
o Description: Enter the invoice description
· **Order Information**
o Order Number
o Bill Of Lading No
o Delivery Place/ Received Place
o Contract No
o Container No
o Contract Date
o Buyer/ Transportation
o Debit Note
· **Detailed Information**
o Account: Press F3 to select the corresponding account from the chart of accounts.
o Currency/ Curry Rate: chọn loại tiền (phần mềm mặc định lấy từ thông tin chung) Select the currency (the system defaults to the one from the general information section).
o Item Code: Press F3 to select the finished goods sold (if applicable).
o Unit: Press F3 to select the finished goods sold (if applicable).
o Quantity
o Unit Price/ Domestic Unit Price: Enter the unit price; the domestic unit price is calculated based on the entered exchange rate.
o Subtotal/ Domestic Amount: Enter the amount; the converted amount is calculated using the entered exchange rate.
o Tax ID
o Tax Amount/ Domestic Tax Amount
o Job Center/ Cost ID/ Profit ID
o Description: Enter the description (the system defaults to the description from the general information section).
#### 3.1.2 Voucher **Released**
This function is used to lock the recorded payable entries and post them to the ledger
· **Released** a single voucher
o Select the voucher to be **Released** from the voucher list.
o Click **Released**
· **Released** multiple vouchers
o In the voucher list, filter vouchers that have not yet been **Released** (status: *Hold*).
o Select the vouchers to be **Released**.
o Click **Released**
# 3.2 Report
#### 3.2.1 AR Detail By Customer
· Select the accounting period to be exported (From date… To date…)
· Select the currency type
**·** Select account **131** or **138**
· Choose to include **all vendors** or filter by a specific vendor
Click **Print Report** to view it on screen or **Export to Excel**.
Similar to the Accounts Payable module, when exporting to Excel, the file will include:
· **Sheet Sum:** summarizes receivables by each customer
· **Detail Sheets:** click **DOCSMAP** to return to the **Sheet Sum** page.
#### 3.2.2 Account Receivable 131 – 138
· Select the accounting period to be exported (From date… To date…)
· Select the currency type
**·** Select account **131** or **138**
#### 3.2.3 Statement of VAT ouput
Similar to Statement of VAT input, select the period (From date… To date…) for which the invoices need to be summarized.
#### 3.2.4. Print Accounting Voucher
#### 3.2.5 AR Overdue Report
· Choose To date
· Select Currency
· Select All or Specific Customer Name
#### 3.2.6 AR Aging Report
# 4.1 Master Data
The Cash Management (CA) module has four main functions:
**· Master Data**
**· Input**
**· Process**
**· Reports**
### 4.1 Master Data
#### 4.1.1 List of Department ID
The List of Department is used to categorize each division of the company according to the management structure.\
Select **New** to enter the department code, department name in Vietnamese, and department name in English, then click **Save**.\
To delete a department, select the corresponding row and click **Delete**
#### 4.1.2 List of Position ID
The List of Position ID used to classify ranks and job titles within the company.\
Select **New** to enter the position code, position name in Vietnamese, and position name in English, then click **Save**.\
To delete a position, select the corresponding row and click **Delete**.
#### 4.1.3 List of Employee ID
The List of Employee ID list is used to record details of employees who frequently handle the company’s cash and bank transactions.\
Enter employee information (Employee Code, Name, Department, Position, Phone Number, Address), then click **Save**.\
To delete an employee, select the corresponding row and click **Delete**
# 4.2 Input
#### 4.2.1 Cash Payment/ Cash Receipt
Cash management is carried out through the Cash Accounting module. All transactions related to cash within the company are created, recorded, and processed in this module
Select **New** to open the data entry window.
· **General Information**
o Voucher No: Enter the payment voucher number, or the system will automatically generate it in sequential order.
o PO Date: Enter the transaction date
o Period: Automatically assigned by the system based on the transaction month
o Receiver: Press F3 to select from the list.
o Cash Account: Press F3 to select or enter the corresponding account number
o Specific Exchange Rate: Select if using the specific exchange rate method.
o Currency/ Currency ID: Depending on the currency type, the system will apply the corresponding exchange rate to VND
o AP Voucher: Press F3 to select the invoices to be paid to the vendor
o Origin Voucher: Enter the original document information (contract, purchase order, etc.).
o Address/ Reason
· **Detail Information**
o Account: Press F3 to select or enter the corresponding account number.
o Description (VN-EN-KR): Automatically linked from the description entered in the general information section.
o Currency/ Cury Rate: Default values are taken from the general information section.
o Unit Price/ Domestic Unit Price: Enter the amount; the converted amount is calculated based on the entered exchange rate
o Tax ID
o Tax Amount/ Domestic Tax Amount: Enter the tax amount; the converted tax amount is calculated based on the entered exchange rate.
o Serial No/ Invoice No/ Invoice Date: Enter the invoice information.
o Employee ID/ Prepayment Voucher: Information related to employee payment vouchers.
o Vendor ID/ Address/ Tax ID: Automatically retrieved from the vendor list.
o JobCentor/ Cost ID/ Profit ID
In the case of making a payment for a vendor invoice.
· In the **Payable** field: Press F3 to search for and select the invoices to be paid.
· You can select one or multiple payable invoices by checking the selection column.
· Once selected, the invoice data will be automatically entered into the data grid.
The selected invoice information will be displayed in the detailed information grid, including:
· Account
· Description
· Unit Price/ Domestic Unit Price
· Tax ID/ Tax Amount/ Domestic Tax Amount
· Invoice Information
· Vendor Information
#### 1.1.1. Cash Receipt/ Bank Receipt
Select **New** to open the data entry window.
· **General Information**
o Voucher No: Enter the receipt voucher number, or the system will automatically generate it in sequential order.
o PO Date: Enter the transaction date
o Period: Automatically assigned by the system based on the transaction month
o Payer: Press F3 to select from the list
o Cash Account: Press F3 to select or enter the corresponding account number
o Currency/Cury Rate: Depending on the currency type, the system will apply the corresponding exchange rate to VND
o AR Voucher: Press F3 to select the invoices to be collected
o Origin Voucher: Enter the original document information (contract, purchase order, etc.).
o Adress/ Reason
· **Detail Information**
o Account: Press F3 to select or enter the corresponding account.
o Description (VN-EN): Automatically linked from the description entered in the general information section.
o Currency/ Cury Rate: Default values are taken from the general information section
o SubToal/ Domestic Amount: Enter the amount; the converted amount is calculated based on the entered exchange rate
o Tax ID
o Tax Amount/ Domestic Tax Amount: Enter the tax amount; the converted tax amount is calculated based on the entered exchange rate
o Serial No/ Invoice No/ Invoice date: Enter invoice information
o Employee ID/ Phiếu phải thu: Information on the employee receipt voucher
o Customer Code ID/ Address/ Tax ID: Automatically retrieved from the customer list.
o Job Center/ Cost ID/ Profit ID
Similar to the **Payment Voucher**, in the case of collecting payments from customer invoices:
· In the **Receivable** field: Press F3 to search for and select the invoices to be collected
· You can select one or multiple invoices by checking the selection column.
· Once selected, the invoice data will be automatically entered into the data grid
**Note**
When entering expenses with input VAT or recording cash revenue with output VAT, two lines should be entered in the detail section:
· **Line 1:** Enter the transaction amount excluding VAT
· **Line 2:** Enter the corresponding VAT — input tax (133) or output tax (333). The VAT amount must be manually calculated and entered by the user
#### 4.2.3 Voucher Released
This function is used to lock recorded cash receipt and payment entries and post them to the ledger.\
The procedure is the same as in the Accounts Receivable and Accounts Payable modules.
· **Released** a single voucher
o Select the voucher to be **Released** from the voucher list
o Click **Released**
· **Released** multiple vouchers
o In the voucher list, filter vouchers that have not yet been **Released** (status: *Hold*)
o Select the vouchers to be **Released**
o Click **Released**
# 4.3 Process
This function is mainly used to evaluate foreign exchange rate differences for foreign currency items.
#### 4.3.1 Ex.Rate Difference Evaluation
Foreign Exchange Revaluation During the Period
· Select the foreign currency Account to be evaluated
· Exchange Gain/Loss Account: Press F3 to select from the account list.
· Start Date / End Date: Specify the period for which the foreign exchange revaluation will be performed
Click **Load** for the system to retrieve all receipt and payment vouchers within the period that are related to the account being evaluated
Click Calculate for the system to compute the average exchange rate during the period and determine the gain or loss difference. The exchange differences will be automatically recorded in the corresponding revenue or expense vouchers. Click Evaluate to save the vouchers.
After recalculating the average exchange rate, all payment vouchers related to this foreign currency account will be updated with the new exchange rate
#### 4.3.2 Ex.Rate Difference End of Period
This function is used to perform end-of-period foreign exchange revaluation for foreign currency items.
· Account Diff/ Profit Account/ Loss Account: Press F3 to select from the account list
· Buying Rate: End-of-period buying exchange rate.
· Selling Rate: End-of-period selling exchange rate.
· Voucher No: Automatically generated in sequential order
· Description
· From date
· Currency ID: The foreign currency to be revaluated at period-end
Similar to the Foreign Exchange Revaluation function, after clicking **Load**, all foreign currency accounts with ending balances will be displayed in the data grid.\
Click **Calculate** for the system to compute the difference between the end-of-period exchange rate and the current balance conversion rate.
# 4.4 Report
#### 4.4.1 Bank Deposit Books/ Petty Cash Books
Displays detailed receipts, payments, and balances for the selected period.\
. Select the reporting period (From date… To date…).\
. Click **Print** to view it on screen or **Export to Excel**.
When exporting to Excel, each cash sub-account will be displayed on a separate sheet.
#### 4.4.2 Daily Cash
Displays receipts, payments, and balances for the selected date.
#### 4.4.3 Detailed Petty Cash Books/ Detailed Bank Deposit Books
Displays detailed cash receipts, payments, and cash balances along with the corresponding offset accounts for each transaction.
· Select the period (From date… To date…).
· Select Currency
· Click Print to preview it on screen or Export to Excel.
When exporting to Excel, there are two options for users:
· VND-USD: By default, the system exports the detailed cash ledger in VND. If **VND–USD** is selected, the report will include both currencies.
· **Level 1 Account:** If selected, all transactions will be exported by main account (111, 112). If not selected, transactions will be exported by sub-account (1111, 1121, etc.)
#### 4.4.4 Detailed Petty Cash Transaction
Details of daily cash receipts and payments within the reporting period
· Select From date… To date
#### 4.4.5 Detailed Statement of Advances to Employees (141)
Displays detailed information on employee advances.
· Select From date… To date
· Choose **Summary** or **Detail**. The **Detail** option will display each advance transaction along with its corresponding offset account.
#### 4.4.6 Detail Bank Books in USD
Similar to the Bank Deposit Detail Ledger, the Foreign Currency Detail Ledger includes an additional column showing the foreign currency amount corresponding to the converted VND value
#### 4.4.7 Print All Payment Voucher/ Print All Receipt Voucher
Prints receipt and payment vouchers for cash or bank transactions.
· Select From date… To date
· Select **Bank Voucher** to print bank transaction vouchers. Leave it blank to print cash transaction vouchers
#### 4.4.8 Cash In/Out Journal Entry
Displays the cash in journal or cash out journal for the selected period.
· Select From date … To date
· Select Cash In Journal Entry or Cash Out Journal Entry
# 5.1 Master Data
The Fixed Assets module helps manage information on fixed assets and track their monthly depreciation and allocation.\
From the category table (Menu), the Fixed Assets module consists of five sections:
· Master Data: List of Fixed Asset Group ID, List of Fixed Assets ID, List of Prepaid Expenses, Calculate Depreciation List, List of Allocation Expenses
· Input: Fixed Asset Disposal, Fixed Asset Revaluation.
· Proccess: Calculate Depreciation, Calculate Allocation Expense
· Reports
### 5.1 Master Data
#### 5.1.1 List of Fixed Asset Group ID
The system classifies fixed assets and prepaid expenses into groups based on their management and usage purposes.
· Group Code: Account group code
· Description (VN, EN)
· Account: Accounting account assigned to the classification group
#### 5.1.2 List of Fixed Assets ID
The Fixed Asset list manages all fixed assets within the company and is linked to the depreciation and disposal settings.
· Asset ID: Input the fixed asset tracking code
· Asset Name: Input name
· History Cost
Number of months the asset has been in use.
· Asset Group: Asset management group.
· Unit
· Purchase Date: Date the fixed asset was purchased
· Quantity:
· Months of depreciation: Estimated useful life in months.
· Start Depreciation Date
· End Depreciation Date
Used for cases where the fixed asset was already in use before being recorded in the software:
· Last Depreciation Date: Date depreciation started
· Last Depreciation Amount: Depreciation value recognized prior to system entry
· Months of last depreciation: Number of months the asset has been in use.
In the **Account** section: detailed accounts used to record depreciation or gain/loss on disposal
· Cost Account: ghi nhận tang giá trị TSCĐ
· Acc. Dep. Account: ghi nhận tang giá trị khấu hao hàng kỳ
· Revaluation Account: trường hợp TSCĐ được mua bằng tiền ngoại tệ
· Profit on Sale Account/ Loss on Sale Account: trường hợp thanh lý TSCĐ
· Expense Dep. Account: ghi nhận chi phí hàng kỳ
· Rate (%) 1: tỷ lệ phân bổ chi phí khấu hao trường hợp TSCĐ dùng cho nhiều mục đích, bộ phận
· Expense Dep. Account
· Rate (%) 2
In the **Other Info: Detailed Information of Fixed Assets**
· Label
· Serial No.
· Model
· Original Country
· Cost ID/ Profit ID/ JobCenter
#### 5.1.3 List of Prepaid Expenses
The Fixed Asset list manages all fixed assets within the company and is linked to the depreciation and disposal settings.
· Tool ID: nhập mã theo dõi chi phí trả trước
· Tool Name: nhập tên chi phí trả trước
· Tool: giá trị theo hóa đơn
· Quantity
In the **General Information** section: detailed information about prepaid expenses.
· Allocate Time: thời gian phân bổ chi phí
· Purchase Date: Ngày mua
· Start Allocate Date
· End Allocate Date
· Cost ID/ Profit ID/ JobCenter
For cases where the expense had already been allocated before being entered into the system:
· Allocated Time: Number of months already allocated.
· Allocated Amount: Number of months already allocated.
· Last Allocate Date: Number of months already allocated.
In the **Default** section: detailed accounts used to record prepaid expense allocations
· Account: Records the prepaid amount.
· Expense Dep. Account: Detailed account used to record allocated expenses
· Rate (%) 1: Allocation rate for cases where the prepaid expense is used for multiple purposes or departments
· Expense Dep. Account 2
· Rate (%) 2
#### 5.1.4 Calculate Depreciation List
Calculate Depreciation List during the period from … to ….
To calculate automatic depreciation by period, select **Calculate Depreciation** to open the journal entry screen.
· Voucher No: tự động theo số thứ tự
· PO Date: ngày hạch toán
· Period: lấy theo tháng hạch toán
· Description VN/EN
Detailed fixed asset codes depreciated during the period are displayed in the data grid. Click **Save** to record the depreciation journal entry.
#### 5.1.5 List of Allocation Expenses
Similar to the Calculate Depreciation List, the **List of Allocation Expense** includes prepaid expenses that will be amortized during the period.
To calculate automatic allocation by period, select **Calculate Allocation Expense** to open the journal entry screen
· Voucher No: Automatically generated in sequential order.
· PO Date: Posting date
· Period: Automatically assigned based on the posting month
· Description VN/EN
Detailed prepaid expense codes for the period are displayed in the data grid. Click **Save** to record the allocation journal entry
# 5.2 Input
#### 5.2.1 Fixed Asset Disposal
Click **New** to open the data entry window
**General Information**
· Voucher No.: Automatically generated by the system;
· PO Date: Date of liquidation;
· Period: Automatically updated by the system based on the voucher date;
· Customer Code: Press F3 to select the customer code
· Order Number
· Liquidation: Select whether it is a fixed asset or a prepaid expense
· TK DT-CP: Press F3 to select the account used to record gain or loss on liquidation
· Currency ID/ Ex. Rate
· Tax Code
· Description (VN/EN/KR)
When selecting **Create Receivable Voucher for Customer**, the invoice information fields will appear for user input.
**Detail Data**
· Asset ID/ Asset Name: Press F3 to select the fixed asset to be liquidated
· Account: Press F3 to select the account used to record the fixed asset
· Description (VN, EN, KR)
· Currency ID/ Cury Rate
· Quantity/ Unit: Quantity of the asset to be liquidated
· Tool: Original value of the fixed asset
· Depreciation Amount: Depreciation value already recorded for the asset
· Remaining Amount
· Depreciation Amount in month
Asset liquidation can be performed partially — for example, if an asset has a quantity of 10, it can be liquidated in multiple transactions
#### 5.2.2 Fixed Asset Revaluation
The same with Fixed Asset Disposal
# 5.3 Process
#### 5.3.1 Calculate Depreciation
To calculate automatic depreciation by period, select **Calculate Depreciation** to open the journal entry screen.
· Voucher No.: Automatically generated in sequential order.
· PO Date: Posting date.
· Period: Automatically assigned based on the posting month
· Description VN/EN
Detailed fixed asset codes depreciated during the period are displayed in the data grid. Click **Save** to record the depreciation journal entry
#### 5.3.2 Calculate Allocation Expense
To calculate automatic allocation by period, select **Calculate Prepaid Expense Allocation** to open the journal entry screen
· Voucher No: Automatically generated in sequential order
· PO Date: Posting date
· Period: Automatically assigned based on the posting month
· Description VN/EN
Detailed prepaid expense codes for the period are displayed in the data grid. Click **Save** to record the allocation journal entry
# 5.4 Reports
#### 5.4.1 Monthly Depreciation
· Choose From date
· Click Print
#### 5.4.2 Revaluation of Fixed Asset
· Choose Fromdate… Todate
· Click Print
#### 5.4.3 Detailed Statement of Fixed Assets
· Choose Fromdate… Todate
· Click Print
#### 5.4.4 Detaied Statement of Pre-Paid Expenses
The same with Detail Statement of Fixed Assets
#### 5.4.5 Fixed Asset Summary Report
The same with Detailed Statement of Fixed Assets
# 6.1 Input
Inventory Management includes 3 parts:
· Input
· Proccess
· Reports
#### 6.1 Input
#### 6.1.1 Receipt Note
This form is used to input data of purchased raw material, goods, and tools.
Choose New to open the input window
**General information**
· Voucher No.: automatically creates
· PO date: document date
· Period: automatically creates based on document date
· Invoice No./ Serial No./ Invoice Form/ Invoice date: invoice information
· Vendor ID: press F3 to get from the master data
· Account: press F3 to get from the master data
· Currency/ Exchange rate
· Description
· Import tax
**Detail information**
There are 3 forms need to input:
· General Info: Key in item ID, quantity, unit price, tax
· Other expenses: Key in other expenses related to purchasing items. User needs to take in the purchasing expenses which already recorded in the AP module.
· Expense allocation: Allocate purchasing expense into an item’s input unit price
#### 6.1.2 Receipt of FG from Manufacturing
Similar to Receipt Note, used to input the finished goods in period.
Choose New to open the input window.
**General information**
· Receipt Note: automatically creates
· PO date: document date
· Period: automatically creates based on the document date
· Deliver
· WIPAcct: accounts for WIP
· Description
**Detail information**
· Item code
· Account
· UOM
· Quantity
· Unit price
· Sub Total
· JobCenter/ Profit ID/ Cost ID
#### 6.1.3 Other input inventory
This form is used to input other inventory
Similar steps as Receipt of FG from Manufacturing
#### 6.1.4 Return to vendor
This form is used to input data in
the case of raw materials, goods, tools are returned to supplier
Choose Voucher which return, then adjust quantity to return. Or can input items one by one.
#### 6.1.5 Material Issue for Production
This form is used to input data in case raw material, and tools are issued for production.
Select quantities issued for production, output unit price is automatically updated when production cost is calculated.
**General information**
· Voucher No: automatically creates
· PO date: document date
· Period: automatically creates based on document date
· Receiver
· Receiver add
· Description
**Detail information**
· Item code: press F3 to get from the master data
· Account: press F3 to get from the master data
· Warehouse: press F3 to get from the master data
· UOM
· Quantity
· Unit price/ SubTotal: được cập nhật sau khi tính giá thành
· Expense Account: tài khoản ghi nhận chi phí nguyên vật liệu
· FG code: press F3 to get from the master data
· JobCenter/ Profit ID/ Cost ID
#### 6.1.6 Delivery Note
This form is used in case finished goods, goods, raw material released for sales.
Determine quantities for sales, and the output unit price is automatically updated when production cost is calculated.
*Note: In case that raw material is issued for sales, expense accounts must be adjusted from account 621 into the cost of goods sold account 632.*
**General information**
· Voucher No.: automatically creates
· PO date: document date
· Period: automatically creates based on document date
· Invoice No./ Serial No./ Invoice Form/ Invoice date: invoice information
· E-invoice
· Customer code
· Account
· Currency/ Exchange rate
· Description
· Receiver/ Receiver Add
**Detail Information**
· Item code: press F3 to get from the master data
· Warehouse: press F3 to get from the master data
· UOM
· Quantity
· Unit price/ Subtotal: được cập nhật sau khi tính giá vốn.
· Expense account/Inventory account/ Revenue account: press F3 to get from the master data
· FG code: press F3 to get from the master data
· JobCenter/ Profit ID/ Cost ID
#### 6.1.7 Other input inventory
Similar to Material Issue for Production
#### 6.1.8 Sales Return
This form is used for data input in the situation where raw material, goods, finished goods delivered back by customers.
Select batch number of the Voucher previously inputted, made the adjustment for quantities of goods returned
#### 6.1.9 Stock Transfer
This form is used to move the stocks from a ware house to another one
Similar steps for Material Issue for Production
#### 6.1.10 Stocktake
This form is used for stock counting in the end of the period. The difference between the reality and book number will be processed and recorded.
Similar steps for Material Issue for Production
#### 6.1.11 Stock Adjustment
This form is used to adjust the gap number between the reality and the book.
Similar steps for Material Issue for Production
# 6.2 Process
#### 6.2.1 Warehouse process: enter price processing period
Choose Fromdate…Todate
Includes 5 steps
· Step 1: Release batches
· Step 2: Input unit price of raw material
· Step 3: Input unit price of raw material
· Step 4: Input cost of goods sold
· Step 5: Post to the general ledger
Release batches
This function is used to release all entries entered in the period in the Input section.
Note: all entries must be released for accurate calculation of production cost and cost of goods sold.
Input unit price of raw material
Raw material issued cost is calculated by two methods:
· Periodic average method,
· Raw material movement average method
Press Load to get all the released transactions or Choose to import transactuons directly
Input unit price of raw material
*Installation finished goods stock in cost:* This form is used when the company does not wish to use the software for finished goods cost calculation, yet it wishes to track finish goods movement and calculate cost of goods sold by the software.
*Calculate finished goods stock in cost:* this function is used to calculate inventory production cost in the period. Smartbook integrates 5 methods for inventory production cost, including
· Phrased method
· Selling price
· Coefficient
· Simple method
· BOM method
a. Inventory production cost calculated by raw material, labour, and overhead expense norm (BOM).
Applied conditions: the company is capable of establishing norms for the usage of direct raw material, labour and overhead expense.
Operation steps:
Step 1: Declaration for BOM
· Setup production procedures,
· Setup usage norms for account 621, 622, 627 comparable to each process,
· Enter expense account 622, 627 incurred in the period, expense account 621 calculated in the step of setup raw material cost issued for production.
Step 2: Inventory production cost
Input the beginning balance and closing balance of WIP
Step 3: Inventory unit cost
This form is used to transfer the mentioned different amount into cost of goods sold account (632)
Step 4: Costing
· Following established BOM and quantities of finished goods produced in the period as well as WIP at the end of the period, the software automatically calculates expense account 621,622,627 as required.
· Comparing actual cost with cost calculated under BOM method.
o In the event cost calculated under BOM method > actual cost (621, 622, 627), the software will allocate actual cost following optional criteria.
o In the event cost calculated under BOM method < actual cost (621, 622, 627), inventory production cost must be under BOM method, the different Amount is optional (record in account 154 or transfer in cost of goods sold in the period).
Input cost of goods sold
Cost of goods sold calculation is determined by 2 methods:
· Average by period
· Average by each output material.
Post to the general ledger
Alll the transaction in the Inventory module in the particular period, which haved calculated, will be input in the GL.
#### 6.2.2 Released batches
It is the first step in the COGS or selling price calculation.
This form is separated in case the users do not need to use COGS calculation, only change the voucher status and record them into GL
# 6.3 Reports
#### 6.3.1 Inventory status
· Fromdate
· Warehouse
· Class code
#### 6.3.2 Inventory Movement
· Choose Fromdate … Todate
· Warehouse
· Class code
· Item ID
· View Summary or View Detail
#### 6.3.3 Inventory Transaction
· Choose Fromdate… Todate
· Warehouse
· Class code
· Item code
# 7.1 Set up
Used to enter sales invoices, issue automatic invoices
E-Invoice module has 3 parts: Setup, Input and Process
### 7.1 Setup
#### 7.1.1 E-Invoice Service Provider Declaration
· E-Invoice provider/ E-Invoice provider name
· Publish service link
· Business service link
· Portal service link
#### 7.1.2 E-Invoice Service Account Declaration
Declare the active accounts
· Account ID/ Account Name
· Certificate Serial
· Service provider
· Service account/Password: from the provider
· Portal account/Password: from the provider
#### 7.1.3 E-Invoice User Account Declaration
Fill in the information of user account.
Create a connection between Smartbooks account with Supplier account (Example: Viettel)
The supplier can create a sub-account for setup access right. So Smartbooks can assign Smartbooks account with each sub-account (Example: Viettel sub-account)
#### 7.1.4 E-Invoice Serial Registration
Declare the invoice information and template
· Form ID
· Form name
· Pattern
· Serial
· Service provider
# 7.2 Input
Invoice date: If the company has a postponement date, you must complete this field as desired. For VIETTEL suppliers, customers can postpone 25 days from the current date, the principle of invoice date must still ensure continuity
For example, today 1st July, customers can post 25 days from 1 st July, and customers choose 15th June to Export, customers will be issued on condition that they have never released an invoice after 15th June
Invoice number: Create automatically according to the symbol that denominator.
#### 7.2.1 E-Invoice Input
To view the list of issued E-Invoices, issued date and statement.
Choose Detail tab to have more information.
User can issue the draft invoice for checking information again
Draft invoice NOT show Invoice date, Invoice no. Other information will be the same as the final invoice.
Choose New to open the input window
General Information
· Voucher No.: automatically creates
· PO date: document date
· Period: automatically creates
· Customer code: press F3 to get from the master data
· Invoice No./ Serial No./ Invoice date
· Bank account
· Currency/ Exchange rate
· Description
Detail Information
· Entry type
· Item code/Item name: press F3 to get from the master data
· UOM
· Quantity
· Unit price/ Subtotal
· Tax ID/ Tax amount
#### 7.2.2 Release Vouchers To E-Invoice
This form uses to transfer accounting documents (Sales, Inventory issue, Revenue…) into e-invoice, so that the users do not have to input data when issue invoice.
· Module: choose module to load the documents
· Fromdate… Todate:
· Choose Load to get data and Execute to transfer data.
# 7.3 Process
#### 7.3.1 E-Invoice Issueing
From the draft list, choose the invoices need to be issued.
Customer can issue the draft invoice for checking information again.
Draft invoice NOT show Invoice date, Invoice no. Other information will be the same as the final invoice.
Choose the process method
· Draft
· Execute
#### 7.3.2 E-Invoice Tracking
E-invoices after issues will be shown on this screen.
This function will have an option:
· Follow e-invoice had registered, is issued
· Cancel e-invoice
· Download e-invoice (PDF file)
For Serial form: click choose invoices and choose from the combo box, an Invoice form will be applied by combo box value
# 8.1 Budget Setup
Budget module comprises two sections:
· Input section: Enter budget.
· Report section: Report on budget.
### 8.1 Budget Setup
User create budget for the current year.
· Year
· Description
· Handling
· Status
# 8.2 Budget Report
· Choose month… year
· Account: press F3 to get from the master data
· View all or by Team ID
# 9.1 Input
This module has 2 parts
· Input
· Report
### 9.1 Input
#### 9.1.1 Setup Approver
Used to setup the approval level between users (who can approve for whom).
· Approved User: user who has the approval rights. Press F3 to get from the master data.
· Submitted user: user who creates the form, the document.
· Tick (✔) on the Right column to assign.
· Save
#### 9.1.2 Request for Payment
This form is used to create, view and control payment request in approval system.
User can make the request for payment and wait for the appoval.
· Choose Fromdate…Todate to filter the requests in that period
· Choose Approval type (eg. *Payment Request*).
· Choose Request Status
Press New to create a new request.
Press View to check the information.
Press Edit to adjust the information.
Use Copy to Excel or Excel – Selection Only to download and save.
Detail information
· Approval Request code: unique code for each request.
· Approval type: eg. Payment Request, …
· Request Status: show the approval process (Wait Request, Wait Approval, Payable, Finished, Rejected…).
· Leave from date / Leave to date: creator và approver.
· Description, Cost center, Operation…: further information for the request.
*Note: only users on Setup Approver - “Approver” can accept or reject the request.*
#### 9.1.3 Payment approval
This form show the list of payment approval
Only “Approver” on Setup Approval can use it
#### 9.1.4 Payable
This form is to view and make the payment for the approved requests.\
This is the last step on the procedure of the payment approval.
· Choose Fromdate… Todate to filter the request.
· Choose the Approval Status:
o Payable: requests which are approved and waited for payment.
o Finished: request which are managed to pay.
· Press View to get the detail.
· Tick on rows which are needed to pay
· Check and Pay.
Choose Copy to Excel or Excel Selection Only to download and save.
Detail information
· Request code: unique code for payment request.
· Approval amount: payment amount
· Cost center / Operation/ Profit center…: payment detail.
· Request status: follow up from “approved” to “paid”.
#### 9.1.5 Travel Request
Similar to Payment Request
#### 9.1.6 Cashier Begin Balance
· Year: year of begin balance
· Cash in hand (VND/ USD).
· Cash in bank (VND/USD)
Press Save
#### 9.1.7 Cashier Book Receive
· Receive type: cash or bank
· Receive date
· Receive amount
· Currency
· Desceiption
Then press Save
To print choose Print sheet
# 9.2 Report
#### 9.2.1 Daily cash report
Choose Date. Export to Excel
# 10.1 Financial Statement
Customer portal is a useful system that SS Audit could communication with our clients. It is also easily within reach through powerful collaboration, and this leads to better client satisfaction.
Business processes such as analyzing and tracking revenue is much easier because the portal is built with the customer in mind. This system has great knowledge management capacity as they can house large numbers of important documents in secure and organized formats. With costs coming under control too, there really are no downsides, but just benefits to having a quality customer portal.
#### 14.2. Log in Smartbooks Website
Access website [https://accsmb.ssaudit.com](https://accsmb.ssaudit.com/)
You can tick the checkbox Remember me to access easier next time. If you don’t have account, please contact us, we will check and feedback you later
Login and choose Customer Portal
Some reports
### 10.1 Financial Statement
#### 10.1.1 Dashboard
· *Customer Number*: total customers – more info is linked to
· Customer List *Vendor Number*: total vendors – more info is linked to Vendor List
· *Receivable Overdue*: Receivable amount would be overdue – more info is linked to Receivable Customer report
· *Payable Overdue*: Payable amount would be overdue – more info is linked to Payable to Vendor report
· *Monthly Recap Report*: Sales amount by Month compare this year and last year
· *Vendor Active YTD*: number of vendors who have at least one of activities this year vs total vendors
· *Customer Active YTD*: number of customers who bought at least one of products this year vs total customers
· *Receive Overdue vs Income*: Receivable amount would be overdue vs Income
· *Sales vs Target*: Sales Amount year to date vs Target (Total Sales amount last year)
· *Total Revenue*: Total amount of revenue components (compare with last year – higher is good)
· *Total Cost*: Total amount of cost components (compare with last year - lower is good)
· *Total Profit*: Total amount of profit (compare with last year – higher is good.
#### 10.1.2 Balance Sheet
For 3 consecutive years
# 10.2 Customer
#### 10.2.1 Dashboard
· Customer Active by Year: Compare the active customers in three years
· Customer Active by Month: number of Customers have bought any products through months this year
· Top 10 Customers report: List of 10 customers that have largest sales amount, compare with total sales
· Customer Outlet: Number of new customers, Returning Customers and Lost Customers in this year
#### 10.2.2 Receivable Customer
Detail of receivable account by customer
# 10.3 Vendor
#### 10.3.1 Dashboard
· Vendor active by year: Compare the active vendor in three years
· Vendor active by month: number of vendor
· Top 10 vendors: List of 10 vendors that have largest purchase amount, compare with total sales
· Vendor Outlet: Number of New Vendor, Returned Vendor and Lost Vendor in this year
#### 10.3.2 Payable to Vendor
Detail payable account by vendor
# 10.4 Revenue
In order to follow up the revenues and income in a year
· Revenue Overall: users can determine the main source of revenue
· Revenue by month/ year: determine the increase and decrease of revenue by periods, point out the peak of business time
· Income statement
# 10.5 Expense
· Expense Overall: Compare the cost components in this year. It could be click on the label of components to hide or show the components in chart
· Expense by Period: Compare the cost components month by month. It could be click on the label of components to hide or show the components in chart
· Income Statement: Statement of income current year which highlighted the cost components
# 10.6 Cash Management
#### 10.6.1 Advances to Employee
# 10.7 Inventory
Inventory reports
#### 10.7.1 Sales YTD by Product
List of sales amounts by products, month by month
· Product name are linked to product detail
· Total: Total sales in the year
· Months: show up to current month
· Progress bar: compare sales the month vs total for the product
#### 10.7.2 Purchase YTD by Vendor
List of purchase amount by vendor
· Vendor code/ Vendor name
· Total: Total sales in the year
· Months: show up to current month
· Progress bar: compare sales the month vs total for the product
# 11. MASTER DATA
# 11.1 Customer List
Choose **New** to open the window
**General Information**
· Customer code
· Customer name
· Parent Customer ID
· Currency
· Active: active customer or stopped customer
**Detail Information**
· Customer Info
o Attention
o Address
o Phone/ Email/ Fax
o Tax code
· Defaults
o Term: press F3 to get from the master data
o Tax ID: press F3 to get from the master data
o AR account: press F3 to get from the master data
o Sales account: press F3 to get from the master data
o Prepayment account: press F3 to get from the master data
· Other Info
o Card No.: Bank account
o Card handler name: card holder
o Expiry Date
o Card type
· Delivery Address
· Note
# 11.2 Vendor List
Similar to Customer List
Press New to open the window
General Information
· Vendor
· Vendor Name
· Active: active or stopped vendor
Detail Information
· Vendor
o Attention
o Address
o Phone No./ Email/ Fax No.
o Registration No.
· Default
o Currency
o AP account: press F3 to get from the master data
o Advance account: press F3 to get from the master data
o Term: press F3 to get from the master data
o Tax ID: press F3 to get from the master data
# 11.3 Category
List of iteam category (if any)
# 11.4 Class
List of item class (if any)
# 11.5 Item List
Choose New to open the window
General Information
· Item
· Description
· Class ID: press F3 to get the master data
· UOM: press F3 to get the master data
· Warehouse: press F3 to get the master data
Detail Information
· Account
o Inventory acct: press F3 to get the master data
o COGS acct: press F3 to get the master data
o Revenue acct: press F3 to get the master data
· Cost Info
o Input tax code: press F3 to get the master data
o Output tax code: press F3 to get the master data
# 11.6 Item Group
List of item group (if any)
# 11.7 Unit
Use to declare the units of measure (UOM) for the items
# 11.8 List of Tax Rate
Tax rates are used in the transactions
· Tax ID
· Description
· Rate (%)
· Sales account
· Purchase account
# 11.9 List Currency
Declare the list of currency used in transactions.
# 11.10 List of Payment Term
Declare the payment terms for receivable accounts, used to calculate for the overdue time and overdue customers
· Terms ID
· Description
· Number of days
# 11.11 Sites
Declare the warehouses in the company
· Warehouse
· Description
· WH type: press F3 to get the master data
# 12. SETUP TOOLS
# 12.1 Configuration
Used to configure the input form, to set number of decimal, number round condition for each module (GL, AR, AP…).
# 12.2 Permission setting
Set the permission for users
· Form access: users can view which reports
· Inventory access: users can access inventory module
· Approval system: users can use approval system
# 12.3 System parameter
System parameter is used to establish and control **genral parameters in accounting**, help to adjust the events or default values in transactions (eg. estimated date, temporary accounts…).
# 12.4 Onhand Stock Setting
Onhand stock setting allow users to set the configugation and linked warehouse for each inventory document (eg. Purchase order, Stock issue, Stock transfer…).\
Thus, system determines which warehouse is used or created when it processes the vouchers.
# 12.5 Posting period
Posting period is used to **block the accounting changings** for months or periods, to prevent the input, edit or delete voucher after checking and making the financial reports.\
The blocking protects the precise and confidentials in data security.
# 12.6 Change Password
Update the user’s password
# 12.7 Company Information
Update company information
· Company code
· Fiscal year
· Tax code
· Name/ Email/ Address
· Telephone/ Fax
· General Director/ Chief accountant/ Prepared: signature names in vouchers
· Import/Export code
Image, logo on the voucher
# 12.8 User Management
Manage the users
· User ID/ FullName
· Password
· Telephone/ Email
· Group ID/ Deparment
· Active: active or stoped
# 13. USER GUIDE
Select the User Guide menu, click on the guide you want to view, and the system will open a PDF file that you can download.
There are four user guides available:
User Guide Web
User Guide Local
User Guide ERP
User Guide HR
# 14. PRODUCT BROCHURE AND DEMO
Click to view introductory documents and try out SmartBooks software products
# 소개
스마트북스 회계 소프트웨어는 총계정원장의 8개의 주요 모듈과 경영 관리를 위한 6개의 확장 모듈로 구성되어 있습니다.
회계를 위한 8개 주요 모듈
· 총계정원장 (General Ledger)
· 미지급금 (Account Payables)
· 미수금 (Account Receivables)
· 현금 관리 (Cash Management)
· 고정자산 (Fixed Asset Management)
· 재고 관리 (Inventory Management)
· 전자세금계산서 (E-Invoice)
· 일반 설정 (Master Data, Setup Tools, User Guide)
경영 관리를 위한 6개 확장 모듈
· 판매 주문 (Sales Order)
· 구매 주문 (Purchase Order)
· 예산 관리 (Budget Management)
· 승인 시스템 (Approval System)
· 고객 포털 (Customer Portal)
\-----------------
**총계정원장**: 이 모듈은 실제 재무 데이터와 예산을 추적하여 재무제표를 생성합니다.
**미지급금**: 이 모듈은 공급업체 지급 및 송장을 추적합니다.
**미수금**: 이 모듈은 고객처 지급 및 송장을 추적합니다.
**현금 관리**: 이 모듈은 현금 및 현금등가물을 추적합니다.
**고정자산**: 이 모듈은 자산 및 분배 비용을 추적합니다.
**재고 관리**: 이 모듈은 재고자산 출입고, 원가 계산, 매출원가를 계산합니다.
**전자세금계산서**: 기업이 자체 인쇄 계산서를 등록한 경우 세금계산서를 자체적으로 출력합니다.
**일반 설정**: 품목 설정 (공급업체, 고객, 계정 체계, 이월체계 등), 사용자 설정 (계정, 비밀번호, 접근 권한 등) 및 소프트웨어 사용 안내와 포함됩니다.
**구매 주문**: 기업의 구매 주문서를 관리하는 모듈입니다.
**판매 주문**: 고객의 주문, 완료 및 배송, 배송 대기 중인 내역을 관리하는 모듈입니다.
**예산 관리: 사내 예산을 관리하는 모듈입니다.**
**승인 시스템**: 구매 주문, 결제, 출장, 출입금 등 승인 제도를 설치할 수 있는 모듈입니다.
**고객 포털**: 연도별, 고객별, 공급업체별로 매출 및 비용에 대한 추세 보고서를 집계합니다.
# 1.1. 항목
### 1. 총계정원장의 체계
총계정원장(GL)은 본 회계시스템의 핵심에 해당합니다.
사용자가 현금, 미수금, 미지급금, 고정자산에 입력하는 모든 거래는 총계정원장에 기록됩니다.
총계정원장은 설정, 입력, 처리, 분개장 및 보고서까지 5개 부문으로 구성됩니다.
· 항목
· 입력
· 처리
· 조회
· 보고서
#### 1.1.1. 계정 항목
스마트북은 2014년 12월 22일자 재무부가 공포한 시행규칙 200/TT-BTC에 규정된 주요 계정과목 공합니목록을 제공합니다.
기존에 규정된 계정과목 레벨 2과 레벨 3 등의 하위계정(최대 레벨5까지) 설정이 가능합니다.
계정 생성 방법
· 계정 번호: 하위계정 코드 입력. \* 참고: Smartbooks는 하위 계정코드는 7자리입니다.
· 계정과목(VN): 베트남어 적요 입력
· 계정과목(EN): 영어 적요 입력
· 계정과목(KR): 한국어 또는 기타 언어 적요 입력
· 계정분류: 자산, 부채, 매출, 비용 등의 성능에 맞는 계정 선택
· 계정그룹: 주요 계정 그룹 선택(계정코드의 앞 3자리)
· 상태: 계정과목의 사용 상태 설정: 사용(Active), 미사용(Inactive)
설정된 계정을 저장하기 위하여 저장(Save), 신규 계정과목 생성시 신규(New), 활성화된 창을 닫을 때에는 닫기(Close) 버튼 클릭
기존 계정과목 삭제 방법
· 삭제를 원하는 계정과목 선택
· 삭제(Delete) 버튼 클릭
참고: 계정과목 설정은 일반분개, 원장 및 재무제표에 직접적인 영향을 미칠 수 있으므로, 계정
삭제 전에는 신중히 고려해야 합니다. 이는 삭제된 계정과 관련된 거래가 존재할 경우 보고서의 정확성이 떨어질 수 있음을 의미합니다.
#### 1.1.2 계정 그룹 항목
Smartbooks는 시행규칙 200/2014/TT-BTC(발표일: 2014.12.22)에 규정된 레벨 1과 레벨 2의 계정과목 목록을 제공합니다.
사용자는 재무부로부터 승인받은 레벨 1 과 레벨 2 이외의 계정과목을 추가할 수 있습니다.
계정 그룹 생성:
· 그룹코드: 계정의 레벨 1 코드 형태
· 그룹명(VN): 베트남어 적요
· 그룹명(EN): 영어 적요
· 그룹명(KR): 한국어 적요
설정된 계정을 저장하기 위하여 **저장(Save)**, 신규 계정과목 생성시 **신규(New)**, 활성화된 창을 닫을 때에는 **닫기(Close)** 버튼 클릭
#### 1.1.3 대차대조표 설정
Smartbooks는 시행규칙 200/2014/TT-BTC(발표일: 2014.12.22)에 규정된 대차대조표 계정이 설정되어 있습니다.
사용자는 비활성화 체크를 통해 대차대조표 상 불필요한 사항을 삭제할 수 있습니다
· 1 단계: 코드, 적요(VN, EN, KR), 합계(합계 함수 사용), 상태 (대차대조표에 표시되거나 숨겨짐) 등의 정보설정
· 2 단계: 대차대조표 상 코드에 따라 잔액 지정.
o 구분(차, 대): 두 가지 유형 (D: 차변 잔액, C: 대변 잔액)
o 계정과목: F3키를 눌러 계정과목을 선택
o 잔액상태: 대차대조표 상에 계산되는 잔액은 음수 (-) 또는 양수 (+)로 반영
o 코드: 대차대조표에 사용되는 코드
o 기초잔액, 기말잔액: 마지막으로 열린 대차대조표 열기의 기초잔액, 기말잔액 (데이터 확인용)
· 3 단계: 상위 수준의 대차대조표 코드에 자회사 대차대조표 코드 설정
· 4 단계: 계정 잔액이 없는 최고 수준의 재무상태표 총괄 코드에 총괄 대차대조표 코드의 설정
#### 1.1.4 계정 잔액의 대체 분개 등록
이 기능은 사용자가 기간 말 자동 대체 방식을 설정하도록 도와줍니다.
설정 안내
· 타계정에서(으로) 대체: 원천 계정 입력 (선택하거나 직접 입력하기 위해 F3키를 누르기)
· AmtType: 원천 계정의 잔액 처리 방식
§ C: 원천 계정의 대변 잔액
§ D: 원천 계정의 차변 잔액
· Step Code: 대체 단계 (예: 참조 계정 5, 6, 7, 8에서 911로 이동하는 것은 Step 1에서 처리되며, 911의 잔액을 4212로 이동하는 것은 Step 2에서 처리됨)
· 적요
# 1.2. 입력
#### 1.2.1. 전표 입력
총계정원장 모듈 사용시, 일반 거래 또는 기타 특정거래를 직접 입력이 가능하니다.
데이터 입력 안내
· **신규를** 선택하여 입력 창을 엽니다.
· 분개 내역:
o 모듈 (Module): 총계정원장(General Ledger, GL)
o 전표번호(Batch no): 자동으로 전표 번호가 생성됩니다. (입력된 내용을 확인하기 위해 F3를 누르기)
o 전표일자(Date): 반드시 회계 월 이내
o 회계 월(Month): 장부기장 해당 월 선택 (예: 2015년 6월 기장: 201506)
o 적요(Description (VN)): 베트남어
o 적요(Description (EN)): 영어
o 적요(Description (KR)): 한국어
o 전표상태(Status):
§ Hold - 임시저장표
§ Released - 처리되어 장부(회계)에 반영된 전표
· 회계 처리
표시할 정보 항목 선택: 설명, 세금, 비용코드, 이익코드, 공정코드 등
o **신규를** 선택하여 입력 창을 엽니다.
o 차변(Debit) 계정: 선택하거나 직접 입력하기 위해 F3키를 누르기
o 대변(Credit) 계정: 선택하거나 직접 입력하기 위해 F3키를 누르기
o 통화단위(Currency unit): 통화단위 선택(VND, USD, KOR 등)
o 환율(Rate Exchange): VND 이외의 기타 통화에 대한 환율 입력
o 금액(Cury Amount): 외화 금액 입력
o 환산 후 금액: 프로그램이 자동으로 계산하거나 사용자가 직접 입력 가능
o 적요 (VN), (EN), (KR): 업무 정보란의 설명 내용을 기준으로 자동 표시됨. 사용자는 직접 입력하여 세부 설명을 수정 가능
o 직원/ 공급업체/ 고객: 사용자가 직접 입력하거나 F3 키를 눌러 아래에 설정된 해당 코드 선택
§ 직원 목록(현금 모듈),
§ 공급업체 목록,
§ 고객처 목록(외상매출금 모듈).
o 세금계산서 번호/ 세금계산서 일자/ 일련번호: 세금계산서 정보(있는 경우)를 입력하면 프로그램이 자동으로 부가가치세 매입/매출 명세서에 반영 가능
o 비용코드/ 매출코드/ 공정코드: 내부 보고나 원가 계산 목적으로 사용
**저장을** 선택하여 입력한 정보 저장
**삭제를** 선택하여 불필요하게 입력된 행 삭제
**복사를** 선택하여 이미 입력된 전표의 모든 정보 불러오기
**처리를** 선택하면 전표의 상태가 **Released로** 전환
#### 1.2.2 채권채무 상계
채권·채무 상계를 하고자 할 때 사용하는 기능입니다.
**신규를** 선택하여 입력 창을 엽니다.
분개 정보 부분과 입력 그리드 부분은 일반 분개 입력과 동일하게 진행됩니다.
**주의**: 거래처별 정확한 채권·채무 내역이 표시되도록 공급처/ 고객코드/ 직원 정보를 입력해야 합니다.
# 1.3. 데이터 처리
#### 1.3.1. 전기
연말에는 일반원장이 모든 거래를 다음 회계연도의 계정 잔액으로 마감합니다.
#### 1.3.2. 전표 마감 해제(Un-release Batch):
이 기능은 사용자가 전기(Post) 또는 확정(Release)된 전표를 원래 상태인 ‘보류(Hold)’ 상태로 복구할 수 있도록 도와줍니다.
상태 복원 안내
· 모듈: 마감 해제가 필요한 회계 모듈을 선택합니다.
o 일반원장(GL)
o 외상매입금(AP)
o 외상매출금(AR)
o 현금 회계(CA)
o 재고(IN)
o 고정자산(FA)
· 전표 조정 기간(Period): 전기된 월 또는 연 단위로 선택할 수 있으며, 불러오기(로드) 버튼을 누르면 마감된 분개 목록이 표시됩니다.
화면 하단에는 선택한 회계 기간에 발생한 마감된 전표들이 표시됩니다.
· 마감 해제가 필요한 전표를 선택합니다.
· \[실행]을 눌러 작업을 진행합니다.
#### 1.3.3 월별 마감
회계 장부를 마감하여, 권한이 없는 사용자가 수정할 수 없는 기능입니다.
# 1.4. 조회
#### 1.4.1. 분개 내역조회(Inquiry)
분개 내역 조회 항목은 사용자가 각 모듈에서 Released된 거래 및 분개 내역을 확인·검토할 수 있도록 도와주는 기능입니다. 엑셀로 내보내거나 화면에서 직접 조회할 수 있습니다.
사용자는 화면에 표시할 항목을 직접 선택할 수도 있습니다.
· 회계 모듈(GL, CA, FA, AP, AR 등)
· 회계기간: 전표일자(예: 012009 → 2009년 01월)
· 전표번호/ 전표일자
· 외화/ 환율
· 차변계정/ 대변계정
· 금액/ 외화금액
· 적요
· 공급업체/ 거래처/ 사원
· 세금계산서 정보
· 비용코드/ 이익코드/ 공정코드
# 1.5. 보고서
회계 모듈에서 모든 회계 데이터가 처리된 후, 사용자는 다음과 같은 보고서를 생성할 수 있습니다.
#### 1.5.1. 시간표
· 회계기간 선택(기산일 \~ 마감일)
· 통화 단위 선택(Currency ID)
· 출력 방식 선택:
§ 화면에서 직접 조회 **(조회)**
§ PDF 형식으로 보고서 인쇄 **(PDF 인쇄)**
§ Excel 파일로 내보내기 **(엑셀 내보내기)**
채권채무 계정(131, 331, 138, 338)이 아닌 계정을 더블 클릭하면, 계정에 따라 명세서가 표시됩니다.
채권채무 계정(131, 331, 138, 338)을 더블 클릭하면, 대상처별 채권채무 내역이 표시됩니다.
대상자별 채권채무 상세내역이 포함된 시산표를 출력할 경우, 해당 채권채무 계정(131, 331, 138, 338)을 더블 클릭한 후 엑셀로 내보내기를 선택합니다.
#### 1.5.2. 총계정원장
· 회계기간 선택(기산일 \~ 마감일)
· 통화 단위 선택(Currency ID)
· 출력 계정 유형 선택(Option)
§ 전체
§ 특정 계정(계정 번호를 선택하여 F3 누르기)
PDF 형식으로 **보고서 인쇄**, 또는 **Excel 파일로** 내보내기 선택
전체 계정(All)을 선택하여 엑셀 내보내기:
· Sheet DOCSMAP: 보고서 엑셀 파일에 포함된 상세 계정 목록
· 확인할 시트로 연결하기 위한 계정 클릭
· 각 상세 엑셀 시트상: DOCSMAP 시트로 돌아가기 위해 DOCSMAP(B10 셀) 클릭
#### 1.5.3. 상세 총계정원장
· 회계기간 선택(기산일 \~ 마감일)
· 통화 단위 선택(Currency ID)
· 출력 계정 유형 선택(Option)
§ 전체
§ 특정 계정(계정 번호를 선택하여 F3 누르기)
· 보고서 선택
PDF 형식으로 보고서 인쇄, 또는 Excel 파일로 내보내기 선택
\- **GLDetail** 보고서를 내보내는 경우
· Sheet Index: 보고서 엑셀 파일에 포함된 상세 계정 목록
· 계정을 클릭하여 조회 시트로 이동
· 각 상세 엑셀 시트상: Index 시트로 돌아가기 위해 DOCSMAP(B10 셀) 클릭
\- **GLDetail Main Account** 보고서를 내보내는 경우: 상위(메인) 계정 기준으로 보고서를 확인합니다.
\- **전체 보고서를** 내보내는 경우: GLDetail 보고서 내보내기와 동일하나 대차대조표(BS), 시산표(TB), 손익계산서(PL) 가 추가로 포함됩니다.
#### 1.5.4. 대차대조표
· 회계기간 선택(기산일 \~ 마감일)
· 통화 단위 선택(Currency ID)
· 화면에서 보기, PDF 형식으로 보고서 인쇄, 또는 Excel 파일로 내보내기 선택
**상세보기 버튼**: 각 지표의 데이터가 어떤 계정에서 가져왔는지를 표시합니다.
**엑셀로 내보내기** 버튼: 다음과 같은 선택으로 보고서를 엑셀로 내보내기
· 상세: 상세 계정의 지표 정보를 포함한 엑셀 파일로 내보내기
· 종합: 지표만 포함된 엑셀 파일로 내보내기
**인쇄** 버튼: 보고서 인쇄
· 집계형 데이터 그리드의 경우: 집계된 수치 기준으로 인쇄
· 상세 데이터 그리드의 경우: 계정의 상세 수치가 포함된 보고서 인쇄
#### 1.5.5. 손익계산서
· 회계기간 선택(기산일 \~ 마감일)
· 통화 단위 선택(Currency ID)
· 화면에서 보기, PDF 형식으로 보고서 인쇄, 또는 Excel 파일로 내보내기 선택
**상세보기 버튼**: 각 지표의 데이터가 어떤 계정에서 가져왔는지를 표시합니다.
**엑셀로 내보내기 버튼**: 다음과 같은 선택으로 보고서를 엑셀로 내보내기
· 상세: 상세 계정의 지표 정보를 포함한 엑셀 파일로 내보내기
· 종합: 지표만 포함된 엑셀 파일로 내보내기
**인쇄** 버튼: 보고서 인쇄
· 집계형 데이터 그리드의 경우: 집계된 수치 기준으로 인쇄
· 상세 데이터 그리드의 경우: 계정의 상세 수치가 포함된 보고서 인쇄
#### 1.5.6. 현금흐름표
· 회계기간 선택(기산일 \~ 마감일)
· 계산법: 직접법 또는 간접법
· PDF 형식으로 보고서 인쇄 또는 Excel 파일로 내보내기 선택
#### 1.5.7. 일일시간표
· 회계기간 선택(기산일 \~ 마감일)
· PDF 형식으로 보고서 인쇄 또는 Excel 파일로 내보내기 선택
#### 1.5.8. 제조 원가 명세서
· 회계기간 선택(기산일 \~ 마감일)
· PDF 형식으로 보고서 인쇄 또는 Excel 파일로 내보내기 선택
#### 1.5.9. 비제조 원가 명세서
· 회계기간 선택(기산일 \~ 마감일)
· PDF 형식으로 보고서 인쇄 또는 Excel 파일로 내보내기 선택
#### 1.5.10. 상세 제조 원가 명세서
· 회계기간 선택(기산일 \~ 마감일)
· 비교기간 선택(기산일 \~ 마감일)
· PDF 형식으로 보고서 인쇄 또는 Excel 파일로 내보내기 선택
#### 1.5.11. 일반 분개장
· 기간 선택(기산일 \~ 마감일)
· PDF 형식으로 보고서 인쇄 또는 Excel 파일로 내보내기 선택
#### 1.5.12. 회계/ 출금/ 입금 전표 출력
· 기간 선택(기산일 \~ 마감일)
· PDF 형식으로 보고서 인쇄 또는 Excel 파일로 내보내기 선택
#### 1.5.13. 자동대체분개
· 기간 선택(기산일 \~ 마감일)
PDF 형식으로 보고서 인쇄 또는 Excel 파일로 내보내기 선택
# 2.1. 입력
외상매입금은 두 가지 주요 기능이 있습니다.
· 입력 (Input)
· 보고서 (Reports)
### 2.1. 입력
#### 2.1.1. 매입영수증
재고이동과 관련된 영수증 입력의 경우, 재고관리 모듈과 연결됩니다.
원재료, 소모품 및 외부 서비스 요금(전기비, 수도비, 전화비, 사무실 임차료, 등)과 관련된 매입 영수증에 대해 입력이 가능합니다.
**매입영수증 입력 세부절차 안내**
**신규를** 선택하여 입력 화면을 엽니다.
· 일반내역 (General area)
o 모듈전표번호(Voucher No.): 전표번호 입력 또는 소프트웨어가 자동 기입.
o 전표일자(Voucher Date): 영수증 날짜는 회계기간이내여야 합니다.
o 기간(mm-yyyy): 소프트웨어가 전표일자를 기준으로 자동 기입합니다.
o 세금계산서 번호/시리얼 번호 / 세금계산서 발행일: 세금계산서에 표시된 정보입니다.
o 매입처(Vendor ID): F3키를 눌러 매입처 목록에서 선택.
o 외상매입금 계정과목: F3키를 눌러 목록에서 선택 또는 상세 계좌 번호를 입력
o 통화 유형: 외화를 선택하여 환율을 입력합니다.
o 지급 방식: : F3키를 눌러 목록에서 선택
o 지급일자: 지급일자 선택
o 적요(Description, VN-EN): 적요 입력
· **상세내역(Detail area)**
영수증의 세부 내역을 나타냅니다. 아래의 데이터 시트 부분에 입력이 가능합니다.
o 계정과목(Account): F3키를 눌러 비용계정 선택
o 통화 유형: 지급에 사용될 통화 유형을 선택합니다. (소프트웨어는 일반내역에서 기본값으로 기입합니다).
o 환율: 선택한 통화의 VND 대비 환율을 입력합니다. (소프트웨어는 일반내역에서 기본값으로 기입합니다).
o 금액: 세금 제외 금액 또는 외화 금액을 입력합니다.
o 환산금액: 입력한 금액에 환율을 곱한 후의 금액입니다.
o 세율(Tax rate): F3 키를 눌러 해당 세율 유형을 선택합니다
o 세금 금액은 실제 발생한 세금 금액입니다.
o 환산 세금 금액은 (있을 경우) 환율을 곱한 후의 금액입니다.
o 적요(Description, VN-EN): 일반내역에 입력한 내용을 자동으로 기입합니다.
o 세금계산서 번호/ 시리얼 번호/ 세금계산서 발행일: 세금계산서에 표시된 정보를 입력합니다.
#### 2.1.2. 모듈전표 마감
본 항목은 외상매입금 모듈에 입력된 전표를 총계정원장에 전기하는 기능을 수행합니다. 전기할 항목 모두 또는 월별로 선택하여 “실행”버튼을 누릅니다.
· 모듈전표를 개별적으로 마감합니다.
o 전표 목록에서 마감할 모듈전표를 선택합니다.
o “마감”를 선택합니다.
· 모듈전표를 일괄적으로 마감합니다.
o 목록에서 마감되지 않은 전표(보류 상태)를 필터링합니다.
o 마감할 전표를 선택합니다.
o “마감 완료”를 선택합니다.
# 2.2. 보고서 (Reports)
#### 2.2.1. 매입처별 전표 상세내역
· 시작 날짜와 종료 날짜를 선택합니다.
· 통화 유형을 선택합니다.
· 331 또는 338 계정을 선택합니다.
· 모든 매입처 또는 개별 매입처를 선택합니다.
보고서를 보려면 **보고서 인쇄**, 또는 **Excel 파일로** 내보내기 선택합니다.
모든 매입처에 대한 보고서를 엑셀 파일로 내보내는 경우
· Sum 시트: 매입처별 왜상매입금 내역을 종합합니다. 매입처를 클릭하면 해당 업체의 상세 시트로 이동합니다.
· 상세 시트: DOCSMAP을 클릭하여 Sum시트로 돌아갑니다.
#### 2.2.2. 거래처별 전표 요약
“매입처별 전표 상세내역”과 동일한 방법으로 조회
· 시작 날짜와 종료 날짜를 선택합니다.
· 통화 유형을 선택합니다.
· 331 또는 338 계정을 선택합니다.
· 모든 매입처 또는 개별 매입처를 선택합니다.
보고서를 보려면 보고서 인쇄, 또는 Excel 파일로 내보내기 선택합니다.
#### 2.2.3. 일반전표: 331-338
“매입처별 전표 상세내역”과 동일한 방법으로 조회합니다.
#### 2.2.4. 매입부가세 조회
· 시작 날짜와 종료 날짜를 선택합니다.
· 보고서를 보려면 보고서 인쇄, 또는 Excel 파일로 내보내기 선택합니다.
#### 2.2.5 모든 지급전표 인쇄/매입처별전표 출력
· 시작 날짜와 종료 날짜를 선택합니다.
· 보고서를 보려면 “인쇄” 버튼을 클릭합니다.
#### 2.2.6. 세금계산서 내역/ 지급 내역
“모든 지급전표 인쇄/ 매입처별전표 출력”과 동일한 방법으로 조회
#### 2.2.7 연체 미지급금 조회
· 보고서 마감일을 선택합니다.
· 통화 종류를 선택합니다.
모든 매입처 또는 개별 매입처 보고서를 인쇄합니다.
#### 2.2.8. 외상매입금 연령 분석
# 3.1. 외상매출금 입력
외상매출금 두 가지 주요 기능이 있습니다.
· 입력 (Input)
· 보고서 (Reports)
### 3.1. 외상매출금 입력
재고이동과 관련된 영수증 입력의 경우, 재고관리 모듈의 판매 항목에서 입력합니다.
본 모듈에는 서비스에 대한 매출 세금계산서 입력을 수행합니다. (재고와 관련 없는 경우)
#### 3.1.1. 매출 세금계산서 입력
“신규”를 선택하여 입력 화면을 엽니다. 모든 전표는 처리되기 전까지 기본적으로 보류(Hold) 상태로 입력됩니다.
· 일반내역(General area):
o 모듈전표번호(Voucher No.): 소프트웨어가 순차적으로 자동 기입
o 전표일자(Voucher Date): 영수증 날짜는 회계기간이내여야 합니다.
o 회계 월(Month): 전표의 월 기준으로 자동 기입
o 세금계산서 번호/ 시리얼 번호/ 세금계산서 발행일: 세금계산서에 표시된 정보를 입력합니다.
o 매출처: F3을 눌러 매출처 코드를 선택합니다.
o 외상매출금 계정과목: F3키를 눌러 목록에서 선택
o 통화 유형/환율: VND 기준 환율로 지급할 통화를 선택합니다.
o 지급 방식: F3키를 눌러 목록에서 선택
o 적요(Description): 해당 거래 내용을 입력(VN-EN)
· 발주서 내역
o 발주서 번호
o 선하증권 번호
o 배송지/수령지
o 계약 번호
o 컨테이너 번호
o 계약일
o 구매자/운송업체
o 비고
· 상세내역(Detail area): 영수증의 세부 내역을 나타냅니다. 아래의 데이터 시트 부분에 입력이 가능합니다.
o 계정과목(Account): F3키를 눌러 해당 매출계정을 선택
o 통화 유형/환율: 통화 선택 (소프트웨어는 일반내역에서 기본값으로 기입합니다).
o 품목 ID: F3을 눌러 출하한 상품(있는 경우) 선택
o 통화 유형: 일반내역에서 기본값을 자동으로 기입합니다.
o 수량
o 단가/환산 단가: 단가를 입력하고, 환산 단가는 입력된 환율에 따라 자동으로 기입됩니다.
o 금액/환산 금액: 금액을 입력하고, 환산 금액은 입력된 환율에 따라 자동으로 기입됩니다.
o 세율.
o 세금/환산 세금 금액
o 공정 코드/비용 코드/이익 코드
o 적요: 적요 입력 (소프트웨어는 일반내역에서 기본값으로 기입합니다).
#### 3.1.2. 모듈전표 마감
본 항목은 외상매출금 모듈에 입력된 전표를 총계정원장에 전기하는 기능을 수행합니다. 전기할 항목 모두 또는 월별로 선택하여 “실행”버튼을 누릅니다.
· 모듈전표를 개별적으로 마감합니다
o 전표 목록에서 마감할 모듈전표를 선택합니다.
o “마감”를 선택합니다.
· 모듈전표를 일괄적으로 마감합니다.
o 목록에서 마감되지 않은 전표(보류 상태)를 필터링합니다.
o 마감할 전표를 선택합니다.
o “마감 완료”를 선택합니다.
# 3.2. 보고서 (Reports)
#### 3.2.1. 고객별 전표 상세내역
· 시작 날짜와 종료 날짜를 선택합니다.
· 통화 유형을 선택합니다.
· 331 또는 338 계정을 선택합니다.
· 모든 매입처 또는 개별 매입처를 선택합니다.
보고서를 보려면 **보고서 인쇄**, **또는 Excel 파일로 내보내기** 선택합니다.
“외상매입금”과 같이 엑셀 파일은 다음을 포함합니다.
· Sum 시트: 거래처별 왜상매입금 내역을 종합합니다. 거래처를 클릭하면 해당 업체의 상세 시트로 이동합니다.
· 상세 시트: DOCSMAP을 클릭하여 Sum시트로 돌아갑니다.
#### 3.2.2 계정 131/138 잔액
· 시작 날짜와 종료 날짜를 선택합니다.
· 통화 유형을 선택합니다.
· 331 또는 338 계정을 선택합니다. 011
#### 3.2.3 부가세 매출세액 명세서
“부가세 매입세액 명세서”와 같이 시작 날짜와 종료 날짜를 선택합니다.
#### 3.2.4. 회계 전표 출력
#### 3.2.5 외상매출금 연체 현황
· 외상매출금 계산 기간을 선택합니다.
· 통화 유형을 선택합니다.
· 모든 거래처 또는 개별 거레처를 선택합니다
#### 3.2.6. 외상매출금 연령 분석
# 4.1. 목록
#### 4.1.1. 부서 목록
회사의 조직도에 기초하여 분류된 각 부서를 등록 및 관리할 수 있습니다.
“신규”를 선택하여 새로운 “부서코드”와 “부서명(EN, VN)”을 입력하고, “저장”을 클릭합니다.
삭제할 항목을 선택한 후, “삭제”를 클릭합니다.
#### 4.1.2. 직급 목록
직급등록은 조직 내 직무의 종류, 책임 정도를 분류하는데 사용됩니다.
**“신규”** 버튼을 선택하여 새로운 “직급코드”와 “직급명(EN, VN)”을 입력하고, **“저장”** 버튼을 클릭합니다.
삭제할 항목을 선택한 후, “**삭제**”를 클릭합니다.
#### 4.1.3. 사원 목록
사원등록은 현금 또는 은행 계좌를 통하여 급여 이체시 사용됩니다.
사원 정보(사원코드, 사원명, 부서, 직책, 전화번호, 주소)를 입력하여 “저장” 버튼을 클릭합니다.
삭제할 항목을 선택한 후, **“삭제”**를 클릭합니다.
# 4.2. 입력
#### 4.2.1. 현금 지출/ 은행 출금
회사 내에서 현금과 관계된 모든 거래는 현금 모듈에 수행 및 저장됩니다. 신규, 저장 및 실행 단계는 다음과 같이 처리됩니다.
“신규”를 선택하여 입력 창을 엽니다.
· 일반내역
o 모듈전표번호(Voucher No.): 지급전표 번호를 입력하거나 소프트웨어가 순차적으로 자동 기입합니다.
o 지급일자(Voucher Date): 거래 발생 일자를 입력합니다.
o 회계월: 거래가 발생한 회계월로 자동 기입
o 수취인: F3을 눌러 목록에서 선택
o 현금계정(Cash account): F3을 눌러 목록에서 선택하거나 현금계정을 입력합니다.
o 실질 환율: 실질 환율 방식으로 계산을 선택한 경우
o 통화 유형/환율: VND 기준 환율로 지급할 통화를 선택합니다.
o 외상매입금: F3을 눌러 매입처에 대한 세금계산서를 선택합니다
o 원본 전표: 원본 전표 정보(계약, 구매 주문서 등)
o 주소/지급사유
· 상세내역
o 현금계정(Cash account): F3을 눌러 목록에서 선택하거나 현금계정을 입력합니다.
o 적요 (VN - EN): 일반내역 부분에 입력된 자료가 자동으로 적용됩니다.
o 통화 유형/환율: 소프트웨어는 일반내역에서 기본값으로 기입합니다.
o 금액/ 환산 금액: 금액을 입력하고, 환산 금액은 입력한 금액에 환율을 곱한 후의 금액입니다.
o 세율
o 세금/ 환산 세금 금액: 세금 금액을 입력하고, 환산 세금 금액은 환율을 곱한 후의 금액입니다.
o 시리얼 번호/ 세금계산서 번호/ 세금계산서 발행일: 세금계산서 정보 입력
o 사원코드/ 지급 전표: 근로자에게 지급하는 전표에 대한 정보
o 매입처 코드/ 주소/ 세금코드: 소프트웨어가 일반내역 부분에 입력된 자료를 자동으로 기입합니다.
o 공정 코드 / 비용 코드 / 매출 코드
매입처에 지급시
· **“외상매입금”** 칸에 F3를 눌러 지급할 세금계산서를 선택
· 체크박스를 통해 1개 또는 다수의 세금계산서를 선택
· “Execute(실행)” 버튼 클릭
모듈전표 검색하여 가져올시 아래의 내용이 자동으로 데이터 시트 부분에 입력됩니다.
· 계정과목
· 적요
· 금액/ 환산 금액
· 세율/ 세금/ 환산 세금 금액
· 세금계산서 정보
· 매입처 정보
#### 4.2.2. 현금 수취 및 은행 입금
**“신규”** 를 선택하여 입력 창을 엽니다.
· 일반 내역
o 모듈전표번호(Receipt No.): 전표 번호를 입력하거나 소프트웨어가 순차적으로 자동 기입
o 작성일: 거래 발생한 일자 입력
o 회계월: 소프트웨어가 자동 기입
o 수취인: F3키를 눌러 목록에서 선택
o 현금계정: F3을 눌러 목록에서 선택하거나 현금계정 입력
o 통화 유형/환율: VND 기준 환율로 지급할 통화 선택
o 외상매입금: F3을 눌러 매입처에 대한 세금계산서 선택
o 원본 전표: 원본 전표 정보(계약, 구매 주문서 등)
o 주소/지급사유
· 상세 내역
o 계정과목: F3을 눌러 목록에서 선택하거나 현금계정을 입력합니다.
o 적요 (VN - EN): 일반내역 부분에 입력된 자료가 자동으로 적용됩니다.
o 통화 유형/환율: 소프트웨어는 일반내역에서 기본값으로 기입합니다.
o 금액/ 환산 금액: 금액을 입력하고, 환산 금액은 입력한 금액에 환율을 곱한 후의 금액입니다.
o 세율
o 세금/ 환산 세금 금액: 세금 금액을 입력하고, 환산 세금 금액은 환율을 곱한 후의 금액입니다.
o 시리얼 번호/세금계산서 번호/ 세금계산서 발행일: 세금계산서 정보 입력
o 사원코드/수취 전표: 근로자에게 수취하는 전표에 대한 정보
o 매입처 코드/주소/세금코드: 소프트웨어가 일반내역 부분에 입력된 자료를 자동으로 기입합니다.
o 공정 코드/비용 코드/매출 코드
“지급 전표”와 동일한 방법으로 조회
· **“미지급금”** 칸에 F3를 눌러 지급할 세금계산서를 선택
· 체크박스를 통해 1개 또는 다수의 전표를 선택
· “Execute(실행)” 버튼 클릭
**유의사항:**
매입 부가세가 포함된 비용이나 매출 부가세가 포함된 현금 매출을 입력하는 경우, 상세내역에 두 행으로 입력합니다.
· 첫번째 행: 부가세를 제외한 금액으로 거래 입력
· 두번째 행: 매입부가세(133) 또는 매출부가세(333)을 입력합니다. 매출부가세의 경우 사용자가 지정한 부가세를 입력합니다.
4.2.3. 전표 마감
이 모듈은 이미 회계 처리된 현금 입/출금 분개를 마감하고 총계정원장으로 이관하는데 사용됩니다. 처리 절차는 외상매출금/외상매입금 회계 모듈(AP)의 전표 마감 절차와 유사합니다.
· 전표를 개별적으로 마감합니다.
o 전표 목록에서 마감할 전표를 선택합니다.
o “마감”를 선택합니다.
· 전표를 일관적으로 마감합니다.
o 전표 목록에서 마감되지 않은 전표(보류 상태)를 필터링합니다.
o 마감할 전표를 산택합니다.
o “마감 완료”를 선택합니다.
# 4.3. 처리
본 기능은 주로 외화화폐성항목의 외환차이를 평가하는 데 사용됩니다.
#### 4.3.1 외환차이 평가
기간 동안 외환차이 평가
· 평가할 외화계정 선택
· 외화환산차손익 기록 계정: F3를 눌러 목록에서 선택합니다.
· 시작일/종료일: 외환차이 평가할 기간
**“가져오기”**를 클릭하면, 프로그램이 평가하려는 계정과 관련된 기간 내의 모든 수입 및 지출 전표를 불러옵니다.
“**계산**”을 눌러 소프트웨어가 기간 중의 평균 환율 및 차이를 계산합니다. 차액은 매출 또는 비용 전표에 자동으로 반영됩니다. “**평가**”를 선택하여 전표를 저장합니다.
평균 환율을 재계산한 후, 해당 외화계정과 관련된 출금전표의 환율 부분이 다시 업데이트됩니다
#### 4.3.2 기말 외환차이 평가
본 기능은 외화화폐성항목의 기말 환율을 재평가하는 데 사용됩니다.
· 와환차이 계정/외화환산차익 계정/외화환산차손 계정: F3를 물러 목록에서 선택합니다.
· 매입율: 기말 매입율
· 매출율: 기말 매출율
· 전표번호: 자동 기입
· 적요
· 실행일
· 통화 유형: 기말에 평가되는 외화
외환차이 평가 기능과 같이, 다운로드를 누른 후 기말 잔액이 있는 외화계정이 데이터 시트에 표시됩니다.
**“계산”**을 선택하면 소프트웨어가 기말 환율과 현재 잔액에 대한 환산 환율 간의 차이를 계산합니다.
# 4.4. 보고서
#### 4.4.1 현금출납부/은행예금장부
기간 동안의 현금 지출, 수납 및 잔액을 표시합니다.
· 시작일(From date)부터 종료일(To date)까지 선택합니다.
· 보고서를 보려면 “인쇄” 버튼을 하고, 엑셀 파일로 보고서를 보려면 “내보내기”를 클릭합니다
**엑셀로 출력 시**, 현금의 세부내용이 각각의 시트에 표시됩니다.
#### 4.4.2 일일현금내역 (Daily Cash)
일일 현금 지출, 수납 및 잔액을 표시합니다.
#### 4.4.3. 현금출납부 (상세)/ 은행장부(상세)
본 보고서는 현금 출입에 대한 상대계정과 함께 영수증 및 결제부분에 대하여 항목별로 나타납니다.
· 시작일(From date)부터 종료일(To date)까지 선택합니다.
· 통화 유형
· 보고서를 보려면 **보고서 인쇄**, 또는 **Excel 파일로 내보내기** 선택합니다.
**엑셀로 내보내는** 경우, 사용자에게 두 가지 선택 사항이 제공됩니다.
· VND-USD: 기본값으로 VND가 설정되어 있습니다, VND-USD를 선택하면 두 가지 외화로 내보냅니다.
· 레벨 1 계정과목: 체크박스 선택시 주요 계정(111, 112) 내보내기가 가능합니다. 체크박스 미선택시 각 계정별 상세내역(1111,1121, 등)을 내보낼 수 있습니다.
#### 4.4.4.. 현금출납부 상세내역
기간 동안의 일일 현금 지출, 수납을 표시합니다.
· 시작일(From date)부터 종료일(To date)까지 선택합니다.
#### 4.4.5. 계정상세내역: 141
본 보고서는 회사에 지급한 가수금/가지급금 계정(141,244,341,342)에 대해 조회가 가능합니다.
· 시작일(From date)부터 종료일(To date)까지 선택합니다.
· 일반 또는 상세 내역을 선택합니다. 상세를 선택하면 각 가수금/가지급금 분개별로 대응되는 계정이 표시됩니다.
#### 4.4.6 외화기준 은행장부 상세내역
은행장부 상세내역과 같이, 외화기준 은행장부 상세내역에는 VND로 환산된 금액에 해당하는 외화 열이 추가로 표시됩니다
#### 4.4.7. 입금전표 출력/출금전표 출력
현금 또는 은행예금에 대한 입금·출금 전표 출력은 다음을 합니다.
· 시작일(From date)부터 종료일(To date)까지 선택합니다.
· “은행전표”박스를 체크하면 은행 회계 전표가 출력됩니다. 미체크하면 현금 회계 전표가 출력됩니다.
#### 4.4.8. 현금 입/출금 내역조회
보고서는 현금 입/출금 내역조회에 대해 조회가 가능합니다.
· 시작일(From date)부터 종료일(To date)까지 선택합니다.
· 입금 또는 출금 선택
# 5.1. 목록
고정자산 관리 모듈은 단기 및 장기 선급비용, 월별 감가상각 계상, 월별 선급비용 배부 등에 대한 업무를 지원합니다.
고정자산관리 모듈은 아래의 5가지 부문으로 구성됩니다:
· 설정: 고정자산 유형, 고정자산, 장기선급비용 등록, 감가상각 고정자산, 선급비용 배분
· 입력: 고정자산 청산 및 재평가
· 데이터처리: 감가비용 및 당기 선급비용 계상
· 고정자산 조회: 고정자산 내용 및 당기 비용 조회
· 보고서
#### 5.1.1. 고정자산 구분
관리 및 사용 목적에 따른 고정자산 및 선급비용 분류합니다:
· 코드: 고정자산 구분코드
· 적요(VN, EN)
· 계정: 계정 과목 코드
#### 5.1.2 고정자산 목록
고정자산 목록은 기업 내 모든 고정자산(TSCĐ)을 관리하며, 감가상각비 설정 및 자산 처분 내역과 연동됩니다.
· 자산 코드(고정자산 코드): 고정자산을 관리하기 위한 코드 입력
· 자산명: 자산의 이름 입력
· 취득가(원가)
자산 항목: 고정자산에 대한 상세 정보
· 자산 그룹: 자산 관리 그룹
· 단위
· 구입일: 고정자산을 새로 구입한 날짜
· 수량
· 감가상각 개월 수: 자산의 사용 예정 개월 수
· 감가상각 시작일
· 감가상각 종료일
사용 중인 고정자산을 소프트웨어에 새로 등록하는 경우:
· 이전 감가상각 시작일: 과거에 감가상각을 시작한 날짜
· 이전 감가상각 금액: 이전까지 감가상각된 금액
· 이전 감가상각 개월 수: 이미 사용된 개월 수
자산의 계정(Account) 부분에서는 감가상각, 재평가, 처분 손익 등을 기록하기 위한 세부 계정
· 원가 계정: 고정자산의 취득원가 증가 기록
· 감가상각누계액 계정: 기간별 인식된 감가상각 누계액 기록
· 자산평가 계정: 외화로 구매한 고정자산의 평가차이를 기록하는 계정
· 자산 처분이익 계정/ 자산 처분손실 계정: 고정자산 처분 시 발생한 손익 기록
· 감가상각비 계정: 매 기간 인식되는 감가상각비 기록
· 배분 비율 1: 고정자산이 여러 부서나 목적에 사용되는 경우 감가상각비 배분 비율
· 감가상각비 계정 2
· 배분 비율 2S
**기타 정보**: 부분에서는 고정자산의 세부적인 부가 정보
· 상표
· 일련번호
· 모델명
· 원산지
· 비용코드/ 이익코드 /공정코드
#### 5.1.3. 배분비 목록
고정자산 목록은 회사의 모든 고정자산을 관리하며, 감가상각비 및 처분 설정과 연동됩니다.
· 비용 코드: 선급비용을 관리하기 위한 코드 입력
· 비용명: 선급비용의 이름 입력
· 취득원가: 세금계산서상의 금액
· 수량
**일반 정보**: 선급비용의 상세정보
· 배분 기간: 비용 배분 기간
· 구매일
· 배분 시작일
· 배분 종료일
· 비용코드/ 이익코드/ 공정코드
비용이 이미 소프트웨어에 입력되기 전에 배분된 경우:
· 배분된 기간: 이전에 배분된 개월 수입니다.
· 배분된 금액: 이전에 배분된 금액입니다.
· 배분 시작일: 비용이 소프트웨어에 입력되기 시작한 날짜
기본 정보 탭: 비용 배분을 위한 상세 계정을 설정하는 구역
· 계정: 선급비용을 인식하는 계정
· 비용 계정 1: 배분비를 인식하는 세부 계정
· 배분 비율 1: 선급비용이 여러 부서나 목적에 사용되는 경우 배분 비율
· 감가상각비 계정 2
· 배분 비율 2
#### 5.1.4. 고정자산 감가상각 목록
당기 시작일부터 종료일까지 감가상각이 발생한 고정자산 목록입니다.
기간별 감가상각을 자동으로 계산하려면, “감가상각비 계산”을 선택하여 분개 입력 화면을 엽니다.
· 전표번호: 순번에 따라 자동으로 생산됩니다.
· 작성일: 회계 처리일
· 회계월: 회계처리 월을 기준으로 불러옵니다.
· 적요(VN/EN)
당기 중 감가상각된 고정자산 코드의 상세내역이 그리드에 표시됩니다. “저장”을 눌러 감가상각 분개를 저장합니다.
#### 5.1.5 선급비용 배분 목록
고정자산 계상 목록과 마찬가지로, 선급비용 배분 목록은 기간 내에 감가상각될 선급비용 항목입니다
기간별 자동 배분을 계산하려면 배분해야 할 선급비용을 선택하여 분개 입력 화면을 엽니다.
· 전표번호: 순번에 따라 자동으로 부여됩니다.
· 전표작성일: 회계처리일입니다.
· 회계월: 회계처리 기준 월입니다.
· 적요 (VN/EN)
당기 선급비용 코드의 상세내역이 그리드에 표시되며, 저장 버튼을 눌러 배분 분개를 저장합니다
# 5.2. 입력
#### 5.2.1. 고정자산 처분
“신규”를 클릭하여 입력 창을 엽니다.
**일반 정보**
· 전표 번호: 소프트웨어가 자동으로 업데이트합니다.
· 전표일자: 청산일자 입력
· 회계 월: 전표일자를 기준으로 소프트웨어가 자동 업데이트합니다.
· 고객 코드: F3 키를 눌러 고객 코드 선택
· 판매전표번호
· 처분: 고정자산 또는 선급비용
· 수익·비용 계정: 처분 시 발생한 이익 또는 손실을 인식할 계정을 F3으로 선택합니다.
· 통화 / 환율:
· 세율
· 적요 (VN/EN/KR)
**외상매출금전표 생성**을 선택하면, 사용자 입력을 위한 세금계산서 관련 정보 입력란이 표시됩니다.
**상세 정보:**
· 자산코드 / 자산명: 처분할 고정자산의 코드를 F3으로 선택합니다.
· 계정: 고정자산을 인식할 계정을 F3으로 선택합니다.
· 적요 (VN, EN, KR):
· 통화/ 환율:
· 수량/ 단위: 처분할 자산의 수량입
· 취득원가: 고정자산의 최초 취득가
· 감가상각 금액: 이미 감가상각된 금액
· 잔존가액: 남은 자산 금액
· 당월 감가상각 금액: 이번 달 감가상각 금액
한가지 자산코드로 여러 차례 처분가능합니다.
#### 5.2.2. 고정자산 재평가
고정자산 처분 단계와 동일하게 수행합니다.
# 5.3. 데이터처리
#### 5.3.1. 감가상각비 계상
· 전표번호: 순번에 따라 자동 부여
· 작성일자: 회계처리일
· 회계월: 회계처리월을 기준
· 적요(VN/EN)
당기 감가상각비 계상할 고정자산 코드의 상세내역이 그리드에 표시되며, “저장”을 눌러 감가상각 분개를 저장합니다
#### 5.3.2. 선급비용 계상
기간별 자동 배분을 계산하려면 배분해야 할 선급비용을 선택하여 분개 입력 화면을 엽니다.
· 전표번호: 순번에 따라 자동 부여
· 전표작성일: 회계처리일
· 회계월: 회계처리 기준 월
· 적요 (VN/EN)
당기 선급비용 코드의 상세내역이 그리드에 표시되며, 저장 버튼을 눌러 배분 분개를 저장합니다
# 5.4. 보고서
#### 5.4.1. 월별 감가상각표
· 월 선택
· 보고서 인쇄 선택
#### 5.4.2 고정자산 재평가 확인서
· 시작일과 종료일 선택
· 보고서 인쇄 선택
#### 5.4.3. 자산 명세서
· 시작일과 종료일 선택
· 보고서 인쇄 선택
#### 5.4.4 선급비용 배분표
고정자산 명세서와 동일하게 수행합니다
#### 5.4.5 고정자산 요약보고서
상세 고정자산 명세서와 동일하게 수행합니다
# 조회
**고정자산 내역 및 비용 조회**

* 조회할 회계기간을 선택 (기산일/마감일)
* “조회(View)” 버튼 선택
# 보고서
## 고정자산 목록
.png?alt=media)
## 월별 감가상각비 내역서
* 조회할 회계기간을 입력(mm-yyyy)
* “인쇄 미리보기(print preview)” 버튼 선택
.png?alt=media)
## 고정자산 재평가 보고서
* 조회할 회계기간을 선택 (기산일/마감일)
* “조회(View)” 버튼 선택
.png?alt=media)
## 고정자산 명세서
.png?alt=media)
## 선급비용 배부내역서
.png?alt=media)
## 고정자산관리대장
.png?alt=media)
# 6.1. 전표입력
#### 6.1.1. 원재료 입고
본 항목은 구매한 원재료, 상품 및 도구들의 데이터를 입력하는 데 사용합니다.
“신규”를 선택하여 입력 창을 엽니다.
**기본설정:**
· 전표번호: 프로그램에서 자동으로 생성됩니다.
· 전표작성일: 전표가 작성된 날짜
· 회계월: 전표일자를 기준으로 프로그램이 자동 계산합니다.
· 세금계산서 번호/ 일련번호/ 양식번호/ 세금계산서 일자: 구매 세금계산서 관련 정보
· 공급업체 코드: F3 키를 눌러 목록에서 선택합니다.
· 계정: F3 키를 눌러 목록에서 선택합니다.
· 통화/ 환율
· 적요
· 수입세
**상세정보:**
입력할 3 가지 항목이 포함됩니다.
· 기본설정: 품목코드, 수량, 단가, 세율
· 기타비용: 구매와 관련하여 발생한 비용을 입력합니다. AP모듈 (외상매입금) 에 기록된 구매비용을 지급해야 합니다.
· 매입비용 배부: 구매비용을 품목 단가로 배부합니다.
· 기타 비용: 구매 관련 부대비용을 입력하는 부분입니다. 이미 AP 모듈에서 회계 처리된 구매비용 전표를 선택합니다.
· 비용 배분: 구매비용을 입고 단가에 배분합니다.
#### 6.1.2 완제품 입고
원재료 데이터 입력과 동일하게, 기간 중 완제품을 입력할 때 사용합니다.
“신규”를 선택하여 입력 창을 엽니다.
기본 정보
· 전표번호: 프로그램에서 자동으로 순번이 부여됩니다.
· 전표작성일: 전표가 작성된 날짜
· 회계월: 작성일을 기준으로 프로그램이 자동 계산합니다.
· 납품자
· 재공품 계정: 당기 재공품을 기록하는 계정
· 적요
상세 정보:
· 자재코드
· 창고계정
· 단위
· 수량
· 단가
· 금액
· 공정코드/ 이익코드/ 비용코드
#### 6.1.3 기타입고
구매 및 생산 이외의 기타 입고 상황을 입력할 때 사용합니다.
완제품 입고 등록과 동일한 방식으로 진행합니다.
#### 6.1.4. 매입 반품
공급업체로부터 구매한 상품을 반품할 때 사용합니다.
작업 방식은 원자재 입고 처리와 동일합니다.
이전에 입력한 매입전표 중 반품할 전표 번호를 선택한 후에 반품 수량을 조정하여 입력합니다.
#### 6.1.5 생산투입 품목
본 항목은 원재료, 제품, 도구를 생산에 사용하기 위해 출고할 경우 입력합니다.
출고 수량을 입력하여 단가는 마감시 “제품제조원가 계산” 과정에서 자동으로 계산됩니다.
기본설정:
· 전표번호: 프로그램에서 자동으로 순번이 부여됩니다.
· 전표작성일: 전표가 작성된 날짜
· 회계월: 전표일자를 기준으로 프로그램이 자동 계산됩니다.
· 수령자
· 수령자 주소
· 적요
상세정보
· 자재코드: F3 키를 눌러 목록에서 선택합니다.
· 창고계정: F3 키를 눌러 목록에서 선택합니다.
· 창고코드: F3 키를 눌러 목록에서 선택합니다.
· 단위
· 수량
· 단가/ 금액: 원가 계산 후 자동으로 업데이트됩니다.
· 비용계정: 원재료비를 인식하는 계정
· 완제품코드: F3 키를 눌러 목록에서 선택합니다.
· 공정코드/ 비용코드/ 이익코드
#### 6.1.6. 판매용 출고
본 항목은 완제품, 상품, 원자재를 판매할 경우 사용합니다.
매출 수량을 입력시, 단가는 마감시 제품제조원가 계산 과정에서 자동으로 계산됩니다.
*주의: 원재료를 판매하는 경우, 비용계정은 계정을 제조원가 계정(621)에서 매출원가 계정(632)으로 조정해야 합니다.*
**기본설정**
· 전표번호: 프로그램에서 자동으로 순번이 부여됩니다.
· 전표작성일: 전표가 작성된 날짜입
· 회계월: 전표일자를 기준으로 프로그램이 자동 계산됩니다.
· 세금계산서 번호/ 일련번호/ 양식번호/ 세금계산서 일자
· 전자세금계산서(E-invoice)
· 고객코드
· 계정: 인식하는 계정
· 통화
· 적요
· 수령자/ 수령자 주소
**상세정보**
· 자재코드: F3 키를 눌러 목록에서 선택합니다.
· 창고계정: F3 키를 눌러 목록에서 선택합니다.
· 창고코드: F3 키를 눌러 목록에서 선택합니다.
· 단위
· 수량
· 단가/ 금액: 매출원가 계산 후 자동으로 업데이트됩니다.
· 비용계정: 원재료비를 인식하는 계정
· 완제품코드: F3 키를 눌러 목록에서 선택합니다.
· 공정코드/ 비용코 / 이익코드:
#### 6.1.7. 기타출고
생산투입 항목과 동일한 방식으로 진행합니다
#### 6.1.8. 매출환입
본 항목은 판매한 원재료, 상품, 완제품이 매출처로부터 반품되었을 경우 사용합니다.
판매한 전표번호를 검색하여 선택한 후 수량을 입력합니다.
#### 6.1.9. 창고이동
창고 간 자재를 이동할 때 사용합니다.
실행 방법은 생산투입 품목과 동일합니다.
#### 6.1.10. 재고실사
기말 재고를 실사할 때 사용합니다. 실제 수량과 장부상 수량의 차이를 확인하여 자동으로 업데이트 및 처리됩니다.
실행 방법은 생산투입 품목과 동일합니다.
#### 6.1.11. 재고조정
실제 수량과 장부상 수량에 차이가 발생한 경우 사용합니다.
실행 방법은 생산투입 품목과 동일합니다.
# 6.2. 제품제조원가 및 매출원가 계산 (Process)
#### 6.2.1 창고 프로세스: 처리기간 입력– 단가 계산
기간을 “시작일 \~ 종료일”로 선택합니다.
본 항목은 아래와 같은 5단계로 구성됩니다:
· 1단계: 재고자산 모듈전표 마감
· 2단계: 투입 원재료 단가 계산
· 3단계: 제품제조원가 설정 / 계산
· 4단계: 매출원가 계산
· 5단계: 총계정원장 전기
**1단계: 재고자산 모듈전표 마감**
조회한 기간에 입력한 모든 전표를 마감합니다.
주의: 제품제조원가와 매출원가 계산을 위해 모든 전표가 마감되어야 합니다.
**2단계: 투입 원재료 단가 계산**
투입된 원재료는 아래의 2가지 방법을 통해 계산됩니다.
· 총평균법
· 이동평균법
출고 분개를 모두 불러오려면 “불러오기”를 선택하거나, 분개를 직접 가져오려면 “파일 선택”을 클릭합니다.
**3단계: 제품제조원가 설정 / 계산 - 제품제조원가 설정**
*제품제조원가 설정:* 본 항목은 회사가 소프트웨어의 제품제조원가 계산 기능을 사용하지 않을 경우에 설정합니다. 매출원가 계산 기능을 수행합니다.
*제품제조원가 계산:* 본 항목은 조회기간의 제품제조원가 단가를 계산합니다. Smartbook에는 다음과 같은 5가지 제품제조원가 계산 방법이 통합되어 있습니다:
· 단계별 원가계산
· 판매단가법
· 가중치법
· 단순 제조원가 계산법
· BOM 표준원가법
a. 표준 원재료, 노무비 및 제조경비(BOM)에 따른 제품제조원가 계산 회사가 재료비, 노무비 및 제조경비 사용 표준을 설정한 경우 적용 가능합니다.
**실행안내**
1 단계: BOM 정보 등록
· 제조단계 설정
· 각 단계별 사용 621(직접재료비), 622(직접노무비), 627(제조경비) 기준 설정
· 621(직접재료비)는 이미 원재료 출고단가 적용 단계에서 계산되며, 해당 기간에 발생한 노무비와 제조경비는 622(직접노무비), 627(제조경비)란에 입력됩니다.
2 단계: 기초재공품 및 기말재공품 집계
3 단계: 완제품 업데이트
4 단계: 제품제조원가:
· 기말 재공품 뿐만 아니라 해당기간의 입력한 완성품 수량과 BOM방법에 따라 자동으로 621(직접재료비), 622(직접노무비), 627(제조경비)을 계산합니다.
· BOM방법에 따른 제조원가와 실제 제조원가 비교
o BOM방법에 따른 제조원가 > 실제 제조원가(621, 622, 627) 경우, 스마트북은 실제 제조원가를 반영합니다.
o BOM방법에 따른 제조원가 < 실제 제조원가(621, 622, 627), BOM에 따른 제조원가를 완제품(154) 원가로 인식합니다. (차액은 다음 단계에서 매출원가로 계상됩니다.)
**매출원가 계산**
· 기간별 평균법
· 출입고 거래별 평균법
**총계정원장으로 전기**
선택한 기간 내 재고 모듈의 모든 거래 중 금액이 계산된 건은 일반분개장(GL) 으로 전표가 전송됩니다.
#### 6.2.2. 재고전표 처리
제품제조원가 또는 매출원가 계산을 수행하기 전의 첫 번째 단계입니다.
이 화면은 사용자가 원가계산 기능을 사용하지 않고, 단순히 재고 분개전표의 상태를 일반분개장(GL)으로 전송하려는 경우에 별도로 제공합니다.
# 6.3. 보고서
#### 6.3.1 재고현황
· 날짜 선택
· 창고 코드 선택
· 원자재 선택
#### 6.3.2. 입출고현황
#### 6.3.3. 창고거래내역
· 조회기간 선택 (시작일 \~ 종료일)
· 창고 코드
· 원자재 코드
# 7.1. 설정
전자세금계산서 메뉴에는 설정, 입력, 처리의 세 가지 하위 모듈이 있습니다.
### 7.1. 설정
#### 7.1.1. 전자세금계산서 공급업체 등록
· 전자세금계산서 공급업체/ 전자세금계산서 공급업체명
· 발행 서비스 링크 (Publish service link)
· 업무 서비스 링크 (Business service link)
· 포털 서비스 링크 (Portal service link)
#### 7.1.2. 계정연동
전자세금계산서 서비스 이용계정 등록
· 계정/ 계정명
· 공인인증서
· 공급업체
· 서비스 계정/ 비밀번호: 서비스 제공업체에서 제공한 정보 입력
· 시스템 계정/ 비밀번호: 서비스 제공업체에서 제공한 정보 입력
#### 7.1.3. 사용자 등록
사용자 계정 정보와 시스템 연결 계정 정보를 모두 입력합니다.
#### 7.1.4. 전자세금계산서 양식 등록
기존 양식에 따라 전자세금계산서에 표시될 정보를 등록합니다.
· 양식 코드/ 양식명
· 세금계산서 양식 번호
· 세금계산서 식별 기호
· 영문명/ 공급자
# 7.2. 입력
이 모듈은 전자세금계산서 정보를 입력하고, 이미 입력된 계산서 목록을 조회하는 기능을 제공합니다.
#### 7.2.1. 전자세금계산서 목록
입력된 전자세금계산서의 목록을 조회할 수 있으며, 검색·추가·삭제·수정 및 신규 작성이 가능합니다.
상세정보 버튼을 눌러 추가 정보를 확인할 수 있습니다.
새로 만들기를 선택하면 입력 창이 열립니다.
#### 기본 설정
· 전표번호: 프로그램이 자동으로 일련번호를 부여합니다..
· 전표일자: 계산서 작성일
· 회계월: 전표일자 기준으로 자동 반영합니다
· 거래처 코드: F3 키로 목록에서 선택합니다.
· 세금계산서 번호/ 시리얼번호/ 계산서 일자
· 은행계좌
· 통화/ 환율
· 적요
#### 상세 정보
· 계산서 유형: 발행할 계산서 종류를 선택합니다.
· 품목코드: F3 키로 목록에서 선택합니다.
· 단위
· 수량
· 단가 / 금액
· 세율 / 세액
#### 7.2.2. 회계전표를 전자세금계산서로 전송
매출, 출고, 수익 등의 회계전표를 전자세금계산서 시스템으로 전송하는 기능입니다.
이를 통해 세금계산서 발행 시 데이터를 다시 입력할 필요가 없습니다.
# 7.3. 처리
#### 7.3.1. 전자세금계산서 발행
세금계산서 목록에서 발행할 계산서를 선택합니다.
처리 방식을 선택할 수 있습니다.
· 임시 발행
· 정식 발행
#### 7.3.1. 전자세금계산서 조회
전자세금계산서 목록과 상태를 확인할 수 있습니다.
조회 기간을 시작일 \~ 종료일로 선택합니다.
# 8.1. 예산설정
사용자가 회계연도의 예산을 생성합니다.
· 회계월
· 지출 사유 입력
· 처리 방법
· 상태
# 8.2. 예산보고서
· 년, 월 선택
· 계정: 목록에서 선택할 F3 선택
· 전체 또는 그룹별 보기
# 9.1. 입력
주로 두 가지 모듈이 포함됩니다.
· 입력
· 보고
### 9.1. 입력
9.1.1. 승인자 설정
시스템 내 사용자 간 승인 관계를 설정하는 데 사용됩니다. (누가 누구의 전표를 승인할 수 있는지 설정)
· 승인자: 승인 권한이 있는 사용자. F3 키를 눌러 목록에서 선택합니다.
· 제출자: 전표를 작성하거나 제출하는 사용자
· 시스템에서 해당 제출자 목록이 표시됩니다.
· 승인 권한을 부여하려면 권한 열에 체크(✔) 표시를 합니다.
· 저장을 클릭합니다.
#### 9.1.2. 지급 요청
승인 시스템에서 지급 요청서를 생성, 조회 및 관리하는 데 사용됩니다.
사용자는 지출 요청서를 작성하여 승인 권한이 있는 상급자에게 제출할 수 있습니다.
· 조회할 기간의 요청서를 필터링하기 위해 시작일 – 종료일 입력
· 승인 유형(예: 지급 요청 - Payment Request)을 선택
· 요청 상태 선택
새 지급 요청을 생성하려면 **신규** 클릭
기존 요청의 내용을 확인하려면 **상세보기** 클릭
정보를 수정하려면 **수정** 클릭
시스템 외에 보관하는 경우, **엑셀로 복사** 또는 **선택한 항목 내보내기**
**상세 정보**
· 요청 ID: 각 요청의 고유 식별 코드
· 승인 유형: 요청의 종류 (예: Payment Request 등)
· 요청 상태: 승인 진행 단계 표시 (Wait Request, Wait Approval, Payable, Finished, Rejected 등)
· 요청자 / 승인자: 요청서를 작성한 사람과 승인 권한이 있는 사람
· 지급 금액, 비용 유형, 공정 코드: 각 요청에 대한 상세 정보
*주의: “승인자” 설정에 따라 승인 권한이 부여된 사용자만 요청을 승인하거나 반려할 수 있습니다.*
#### 9.1.3. 지급 승인
지급 승인 요청 목록이 표시됩니다.
승인은 **승인자 설정** 모듈에서 지정된 “승인자”만 수행할 수 있습니다.
#### 9.1.4. 지출 승인
승인된 지급 요청서에 대한 실제 지급을 확인하고 실행하는 데 사용됩니다.
이는 지급 승인 프로세스의 마지막 단계입니다.
· 지급 대상 요청서를 필터링하기 위해 시작일 – 종료일 선택
· 승인 상태 선택:
§ Payable: 승인 완료, 지급 대기 중인 요청
§ Finished: 지급이 완료된 요청
· **상세보기**를 눌러 각 요청의 세부 정보 확인
· 승인할 항목의 체크박스 선택
· 지급 승인을 실행하기 위해 지급 클릭
시스템 외에 보관하는 경우, **엑셀로 복사** 또는 **선택한 항목 내보내기**
**상세 정보**
· 요청 ID: 지급 요청의 코드
· 지급 금액, 비용 유형, 공정 코드: 지출 항목의 상세 정보
***주의: 승인자 (승인 설정 기준)** 만 이 작업을 수행할 수 있습니다.*
#### 9.1.5. 출장 요청
지급 요청과 동일한 방식으로 수행됩니다.
#### 9.1.6. 기초 현금출납부
기초 현금출납부 화면으로 이동하여 신규를 클릭합니다.
· 년도: 기초 금액을 설정할 연도
· 보유 현금 (VND/USD)
· 은행 예금 (VND/USD)
**저장**을 선택합니다.
#### 9.1.7. 출납원
· 수령 유형: 현금 또는 계좌이체로 수령
· 수령일자
· 수령 금액
· 수령 통화 종류
· 적요
입력 후 저장을 클릭합니다.
이 전표를 인쇄하려면 **전표 인쇄**를 선택합니다.
# 9.2. 보고
#### 9.2.1. 현금출납부 보고
조회 종료일을 선택하여 엑셀로 내보내기를 선택합니다.
# 10.1. 재무제표
Customer Portal은 SS 회계법인이 파트너와 효과적으로 상호작용할 수 있도록 돕는 유용한 시스템입니다. 강력한 협업 기능을 통해 손쉽게 접근할 수 있으며, 이는 고객 만족도를 한층 높이는 결과로 이어집니다.
Customer Portal이 매출 분석 및 추적과 같은 비즈니스 프로세스도 훨씬 간편해지기 위해 고객의 관점에서 설계된 시스템이기 때문입니다. 이 시스템은 각 기업의 특성에 맞게 정보를 수집, 통합 및 제공할 수 있으며, 기업이 고급스럽고 개별화된 커뮤니케이션 방식을 구축할 수 있도록 지원합니다. 또한 비용 관리가 용이하기 때문에, 품질 높은 Customer Portal을 도입하면 단점 없이 순수한 이점만 제공하는 솔루션이 됩니다.
스마트북 웹사이트 로그인
웹사이트 에 접속합니다.
아이디와 비밀번호는 자동으로 입력됩니다.
로그인 버튼을 클릭한 후, 고객 포털 메뉴를 선택합니다.
아래는 일부 보고서 화면의 개요입니다.
아래는 일부 **보고서 화면의 개요**입니다.
### 10.1. 재무제표
#### 10.1.1. 개요
· 고객 수: 회사의 총 고객 수입니다. 세부 내역은 거래처 목록에 연결됩니다.
· 공급업체 수: 전체 공급업체 수입니다. 세부 내역은 공급업체 목록에 연결됩니다.
· 연체 미수금: 연체된 미수 금액 - 고객별 미수금 보고서로 연결
· 연체 미지급금: 연체된 지급 금액 - 공급업체별 미지급금 보고서로 연결
· 매출액: 월별 판매 실적을 현재 연도와 전년도 기준으로 비교하는 보고서
· 연간 공급업체: 총 공급업체 중 금년에 실제 거래가 있는 공급업체 수
· 연간 거래처: 총 고객 중 금년에 거래가 발생한 고객 수
· 연체 미수금 대비 매출 비율: 연체된 미수금이 총매출에서 차지하는 비율
· 실제 매출 대비 목표 매출: 올해의 실제 매출액을 전년도 또는 설정된 목표와 비교
· 총매출: 총 수입 금액 (전년 대비 높을수록 좋음)
· 총비용: 총 지출 금액 (전년 대비 낮을수록 좋음)
· 총이익: 총 수익 금액 (전년 대비 높을수록 좋음)
#### 10.1.2. 대차대조표
최근 3년간의 데이터가 표시됩니다.
# 10.2. 고객
#### 10.2.1. 개요
· 연도별 활성 고객 차트: 3년 동안의 활성 고객 수 비교
· 월별 활성 고객 차트: 연간 월별 제품을 구매하는 고객 수
· 상위 10개 고객 보고서: 매출 대비 판매액이 가장 많은 10개의 고객사 목록
· 고객 아울렛과 비교: 올해 신규 고객, 재거래 고객 및 이탈 고객 수
#### 10.2.1. 외상매출금
고객 코드별로 미수금 내역입니다.
# 10.3. 공급업체
#### 10.3.1. 개요
· 연도별 활성 고객 차트: 3년 동안의 활성 공급업체 수 비교
· 월별 총 공급업체 수: 공급업체 수
· 상위 10개 공급업체 매출 보고서: 연간 기준으로 미지급금이 가장 많은 상위 10개 공급업체 목록
· 신규 공급업체: 해당 연도에 처음으로 거래를 시작한 공급업체 수
· 재거래 공급업체: 과거에 거래 이력이 있으며, 다시 거래를 시작한 공급업체 수
· 이탈 공급업체: 과거 거래 이력이 있으나, 회계기간에는 거래가 발생하지 않은 공급업체 수
#### 10.3.2. 외상매입금
공급업체별로 부채 목록입니다.
# 10.4. 매출
회사의 연도별 매출, 비용 및 이익을 모니터링하는 데 사용됩니다.
· 종합 매출 요약표: 사용자가 기업의 주요 매출원을 한눈에 파악할 수 있도록 도와줍니다.
· 월별/ 연도별 매출 차트: 시간에 따른 매출 증감 추세 분석 및 매출이 집중되는 성수기 기간 확인
· 연간 상세 손익보고서
# 10.5. 비용
· 전체 비용 치트: 연간 비용 구성 요소를 비교합니다. 항목의 레이블을 클릭하면 해당 항목을 숨길 수 있습니다.
· 월별 비용: 월별 비용 항목을 비교합니다. 마찬가지로 레이블 클릭 시 항목을 숨길 수 있습니다.
· 손익계산서: 비용 구성 요소를 강조 표시한 현재 연도의 손익 계산서입니다.
# 10.6. 현금관리
#### 10.6.1. 가불금
#### 10.6.2. 현금출납부
#### 10.6.3. 일일출납부
# 10.7. 재고
재고에 관련된 보고서입니다.
#### 10.7.1. 제품별 판매 목록
#### 10.7.2. 공급업체별 연간 구매 목록
# 11.1. 고객 목록
신규를 클릭하여 입력 창을 엽니다.
**기본 정보**
· 고객 코드
· 고객명
· 결제 고객 코드
· 통화 단위
· 활동 상태: 고객이 활동 중인지, 영업 중단 상태인지 표시합니다.
**기본 정보**
· 고객 코드
o 대표자
o 주소
o 전화번호 / 이메일 / 팩스 번호
· 기본 설정
o 결제 기한: F3 키를 눌러 목록에서 선택
o 세율: F3 키를 눌러 목록에서 선택
o 미수금 계정: F3 키를 눌러 목록에서 선택
o 매출 계정: F3 키를 눌러 목록에서 선택
o 선수금 계정: F3 키를 눌러 목록에서 선택
· **기타 정보**
o 카드 번호: 은행 계좌 번호
o 카드 소유자명: 계좌 명의자 이름
o 만료일
o 카드 종류
**· 배송 주소**
**· 비고**
# 11.2. 공급업체 목록
고객 목록과 동일한 방식으로 구성됩니다.
신규 버튼을 눌러 입력 창을 엽니다.
기본 정보
· 공급업체 코드
· 공급업체명
· 활동 상태: 공급업체의 활동 또는 중단 상태 여부
상세 정보
· 공급업체 정보
o 대표자
o 주소
o 전화/ 이메일/ 팩스
o 세금번호
· 기본 설정
o 거래 통화 단위
o 미지급금 계정: F3 키를 눌러 목록에서 선택
o 선급금 계정: F3 키를 눌러 목록에서 선택
o 결제 기한: F3 키를 눌러 목록에서 선택
o 세율: F3 키를 눌러 목록에서 선택
o 계정명
# 11.3. 종류 목록
자재 종류를 분류하는 목록입니다.
# 11.4. 그룹 목록
자재 그룹을 분류하는 목록입니다.
# 11.5. 자재, 물품 목록
**신규** 버튼을 눌러 입력 창을 엽니다.
**기본 정보**
· 품목 코드/ 품목명
· 설명
· 그룹 코드: F3 키를 눌러 목록에서 선택
· 단위/ 단위 그룹: F3 키를 눌러 목록에서 선택
· AQL 코드/ 그룹 코드
· 최소 재고량: 필요 시 최소 재고 수준 설정
· 모델 여부/ 모델명
· 입고 QC/ 공정 QC
· 기술 사양(두께, 폭 등): 자재의 기술적 세부 정보
**상세 정보**
**· 기본 정보**
o 매입 단위/ 판매 단위: 매입·판매 시 사용하는 단위
o 창고 코드
o 기타 자재 코드
o 매입 세율 / 매출 세율
o 판매 단가
· 계정 정보
o 창고 계정: F3 키를 눌러 목록에서 선택
o 원가 계정: F3 키를 눌러 목록에서 선택
o 매출 계정: F3 키를 눌러 목록에서 선택
---
[Next Page](/llms-full.txt/1)
.png?alt=media)
.png?alt=media)
.png?alt=media)
.png?alt=media)
.png?alt=media)
.png?alt=media)
.png?alt=media)
.png?alt=media)
.png?alt=media)
.png?alt=media)
.png?alt=media)
.png?alt=media)
.png?alt=media)
.png?alt=media)
.png?alt=media)
.png?alt=media)
.png?alt=media)
.png?alt=media)
.png?alt=media)
.png?alt=media)
.png?alt=media)
.png?alt=media)
.png?alt=media)
.png?alt=media)
.png?alt=media)
.png?alt=media)
.png?alt=media)
.png?alt=media)
.png?alt=media)
.png?alt=media)
.png?alt=media)
.png?alt=media)
.png?alt=media)
.png?alt=media)
.png?alt=media)
.png?alt=media)
.png?alt=media)
.png?alt=media)
.png?alt=media)
.png?alt=media)
.png?alt=media)
.png?alt=media)
.png?alt=media)
.png?alt=media)
.png?alt=media)
.png?alt=media)
.png?alt=media)
.png?alt=media)
.png?alt=media)
.png?alt=media)
.png?alt=media)
.png?alt=media)
.png?alt=media)
.png?alt=media)
.png?alt=media)
.png?alt=media)
.png?alt=media)
.png?alt=media)
.png?alt=media)
.png?alt=media)
.png?alt=media)
.png?alt=media)
.png?alt=media)
.png?alt=media)
.png?alt=media)
.png?alt=media)
.png?alt=media)
.png?alt=media)
.png?alt=media)
.png?alt=media)
.png?alt=media)
.png?alt=media)
.png?alt=media)
.png?alt=media)
.png?alt=media)
.png?alt=media)
.png?alt=media)
.png?alt=media)
.png?alt=media)
.png?alt=media)
.png?alt=media)
.png?alt=media)
.png?alt=media)
.png?alt=media)
.png?alt=media)
.png?alt=media)
.png?alt=media)
.png?alt=media)
.png?alt=media)
.png?alt=media)
.png?alt=media)
.png?alt=media)
.png?alt=media)
.png?alt=media)
.png?alt=media)
.png?alt=media)
.png?alt=media)
.png?alt=media)
.png?alt=media)
.png?alt=media)
.png?alt=media)
.png?alt=media)
.png?alt=media)
.png?alt=media)
.png?alt=media)
.png?alt=media)
.png?alt=media)
.png?alt=media)
.png?alt=media)
.png?alt=media)
.png?alt=media)
.png?alt=media)
.png?alt=media)
.png?alt=media)
.png?alt=media)
.png?alt=media)
.png?alt=media)
.png?alt=media)
.png?alt=media)
.png?alt=media)
.png?alt=media)
.png?alt=media)
.png?alt=media)
.png?alt=media)
.png?alt=media)
.png?alt=media)
.png?alt=media)
.png?alt=media)
.png?alt=media)
.png?alt=media)
.png?alt=media)
.png?alt=media)
.png?alt=media)
.png?alt=media)
.png?alt=media)
.png?alt=media)
.png?alt=media)
.png?alt=media)
.png?alt=media)
.png?alt=media)
.png?alt=media)
.png?alt=media)
.png?alt=media)
.png?alt=media)
.png?alt=media)
.png?alt=media)
.png?alt=media)

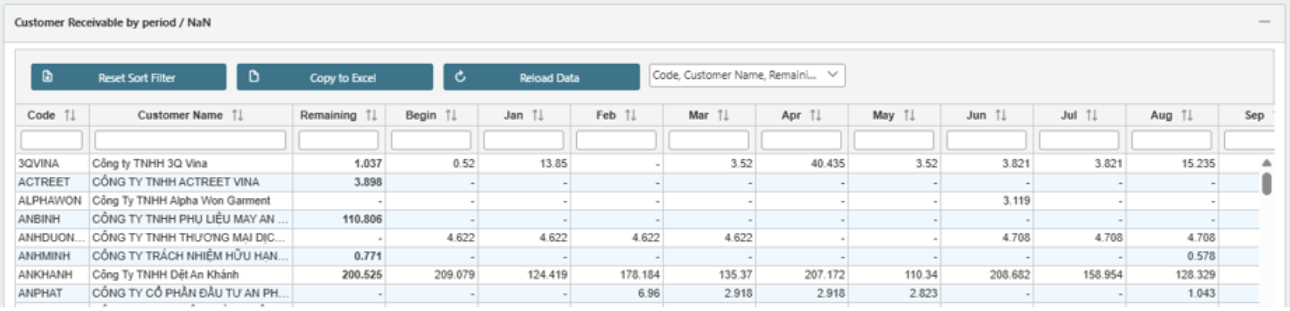
.png?alt=media)
.png?alt=media)
.png?alt=media)
.png?alt=media)
.png?alt=media)
.png?alt=media)
.png?alt=media)
.png?alt=media)
.png?alt=media)
.png?alt=media)
.png?alt=media)
.png?alt=media)
.png?alt=media)
.png?alt=media)
.png?alt=media)
.png?alt=media)
.png?alt=media)
.png?alt=media)
.png?alt=media)
.png?alt=media)
.png?alt=media)
.png?alt=media)
.png?alt=media)
.png?alt=media)
.png?alt=media)
.png?alt=media)
.png?alt=media)
.png?alt=media)
.png?alt=media)
.png?alt=media)
.png?alt=media)
.png?alt=media)
.png?alt=media)
.png?alt=media)
.png?alt=media)
.png?alt=media)
.png?alt=media)
.png?alt=media)
.png?alt=media)
.png?alt=media)
.png?alt=media)
.png?alt=media)
.png?alt=media)
.png?alt=media)
.png?alt=media)
.png?alt=media)
.png?alt=media)
.png?alt=media)
.png?alt=media)
.png?alt=media)
.png?alt=media)
.png?alt=media)
.png?alt=media)
.png?alt=media)
.png?alt=media)
.png?alt=media)
.png?alt=media)
.png?alt=media)
.png?alt=media)
.png?alt=media)
.png?alt=media)
.png?alt=media)
.png?alt=media)
.png?alt=media)
.png?alt=media)
.png?alt=media)
.png?alt=media)
.png?alt=media)
.png?alt=media)
.png?alt=media)
.png?alt=media)
.png?alt=media)
.png?alt=media)
.png?alt=media)
.png?alt=media)
.png?alt=media)
.png?alt=media)
.png?alt=media)
.png?alt=media)
.png?alt=media)
.png?alt=media)
.png?alt=media)
.png?alt=media)
.png?alt=media)
.png?alt=media)
.png?alt=media)
.png?alt=media)
.png?alt=media)
.png?alt=media)
.png?alt=media)
.png?alt=media)
.png?alt=media)
.png?alt=media)
.png?alt=media)
.png?alt=media)
.png?alt=media)
.png?alt=media)
.png?alt=media)
.png?alt=media)
.png?alt=media)
.png?alt=media)
.png?alt=media)
.png?alt=media)
.png?alt=media)
.png?alt=media)
.png?alt=media)
.png?alt=media)
.png?alt=media)
.png?alt=media)
.png?alt=media)
.png?alt=media)
.png?alt=media)
.png?alt=media)
.png?alt=media)
.png?alt=media)
.png?alt=media)
.png?alt=media)
.png?alt=media)
.png?alt=media)
.png?alt=media)
.png?alt=media)
.png?alt=media)
.png?alt=media)
.png?alt=media)
.png?alt=media)
.png?alt=media)
.png?alt=media)
.png?alt=media)
.png?alt=media)
.png?alt=media)
.png?alt=media)
.png?alt=media)
.png?alt=media)
.png?alt=media)
.png?alt=media)
.png?alt=media)
.png?alt=media)
.png?alt=media)
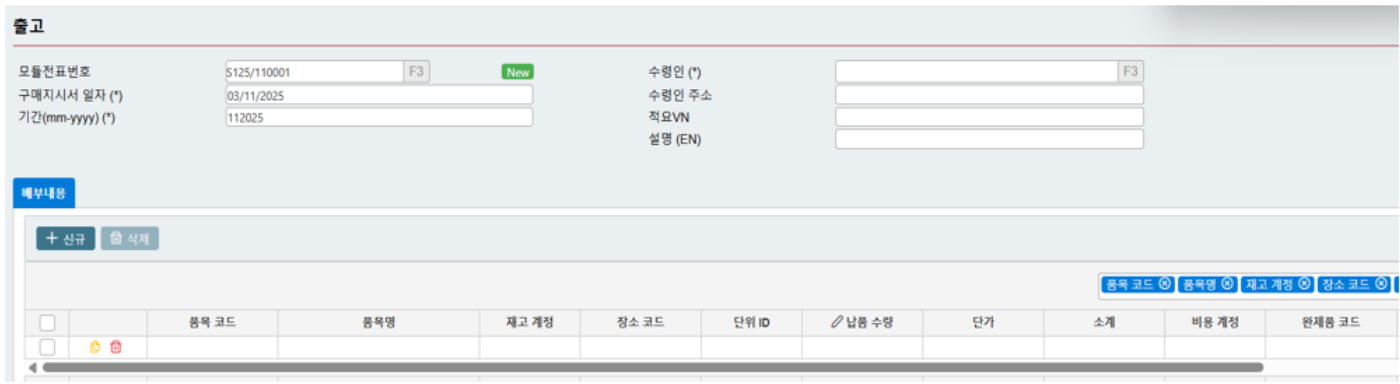
.png?alt=media)
.png?alt=media)
.png?alt=media)
.png?alt=media)
.png?alt=media)
.png?alt=media)
.png?alt=media)
.png?alt=media)
.png?alt=media)
.png?alt=media)
.png?alt=media)
.png?alt=media)
.png?alt=media)
.png?alt=media)
.png?alt=media)
.png?alt=media)
.png?alt=media)
.png?alt=media)
.png?alt=media)
.png?alt=media)
.png?alt=media)
.png?alt=media)
.png?alt=media)
.png?alt=media)
.png?alt=media)
.png?alt=media)
.png?alt=media)
.png?alt=media)
.png?alt=media)
.png?alt=media)
.png?alt=media)
.png?alt=media)
.png?alt=media)
.png?alt=media)
.png?alt=media)
.png?alt=media)
.png?alt=media)
.png?alt=media)
.png?alt=media)
.png?alt=media)
.png?alt=media)
.png?alt=media)
.png?alt=media)
.png?alt=media)
.png?alt=media)
.png?alt=media)
.png?alt=media)
.png?alt=media)
.png?alt=media)
.png?alt=media)
.png?alt=media)
.png?alt=media)
.png?alt=media)
.png?alt=media)
.png?alt=media)
.png?alt=media)
.png?alt=media)
.png?alt=media)
.png?alt=media)